
Cutting and threading pipe is a fundamental skill in plumbing and industrial applications, essential for creating secure and leak-free connections. Whether you’re working with galvanized steel, black iron, or other pipe materials, mastering this process ensures your piping systems function reliably. This guide will walk you through the necessary steps and tools to achieve professional results.
Proper pipe cutting and threading not only prevent leaks but also maintain the integrity of your piping system. Understanding the techniques and safety precautions involved is crucial for both DIY projects and professional installations. This blog provides comprehensive insights for successful pipe work, from selecting the right tools to executing precise cuts and threads.
What Is Thread Pipe?
Threaded pipe refers to pipes that have screw threads on their ends, designed to connect with fittings, valves, or other pipes. These threads provide a mechanical seal, often enhanced with thread sealant, to create a leak-free connection for transporting fluids or gases. The threads can be tapered or straight, depending on the application and the type of seal required. Tapered threads, like NPT (National Pipe Thread), create a seal by wedging tightly together, while straight threads, like NPS (National Pipe Straight), require a gasket or O-ring.
Threaded pipes are widely used in various industries, including plumbing, oil and gas, and manufacturing, due to their versatility and reliability. They come in different materials, such as steel, brass, and PVC, to suit various applications and environmental conditions. Understanding thread types, sizes, and standards is crucial for ensuring proper connections and preventing leaks, which can lead to costly repairs and safety hazards.
How to Cut and Thread Pipe?
Cutting and threading pipe is a fundamental skill for anyone working with plumbing or piping systems. It allows you to create custom-length pipes with secure, leak-free connections. We’ll guide you through the process, ensuring you achieve professional results with the right tools and techniques.
Step 1: Measuring and Marking the Pipe
Before you begin, accurately measure the required length of the threaded pipe. Use a measuring tape or ruler and mark the cutting point with a permanent marker. Double-check your measurements to avoid costly errors, as precision is crucial in pipe fitting. Remember to account for the length of the threads you’ll be adding, especially if you’re working with specific fittings.
You’ll want to take your time here, measuring accurately will prevent waste. Double checking your marks will save you from having to redo your work. Remember that the threaded portion will add to the overall length of the pipe.
Ensure your pipe is securely clamped in a pipe vise to prevent movement during cutting and threading. A stable setup is essential for safety and accuracy. If you’re working with galvanized or steel pipe, wear safety glasses and gloves to protect yourself from metal shavings.
A secure clamp is vital for your safety, and the quality of your cuts. Safety glasses and gloves will protect you from metal shavings.
Step 2: Cutting the Pipe
Using a pipe cutter, score a line around the pipe at your marked point. Rotate the cutter around the pipe, gradually tightening the blade until it cuts through. Avoid excessive pressure, as this can deform the pipe. For larger diameter pipes, you might need to use a hacksaw. If you are using a hacksaw, make sure to cut as square as possible.
A pipe cutter is your best bet for clean, straight cuts. Rotate the cutter, and tighten as you go, to prevent deforming the pipe. Hacksaws can be used for larger pipes, but take extra care to cut straight.
Once the pipe is cut, use a file or deburring tool to remove any sharp edges or burrs from the inside and outside of the pipe. This step is crucial for ensuring a smooth, leak-free connection. Clean the pipe thoroughly to remove any metal shavings or debris that could contaminate the system.
Deburring the pipe will prevent leaks, and contamination. Use a file, or deburring tool, to smooth the edges. Clean the pipe to remove metal shavings.
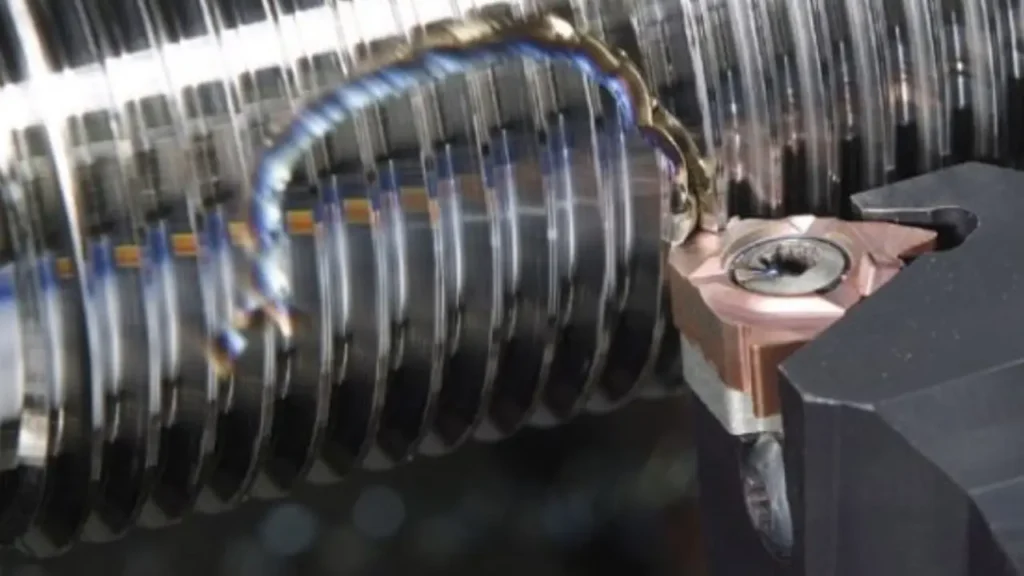
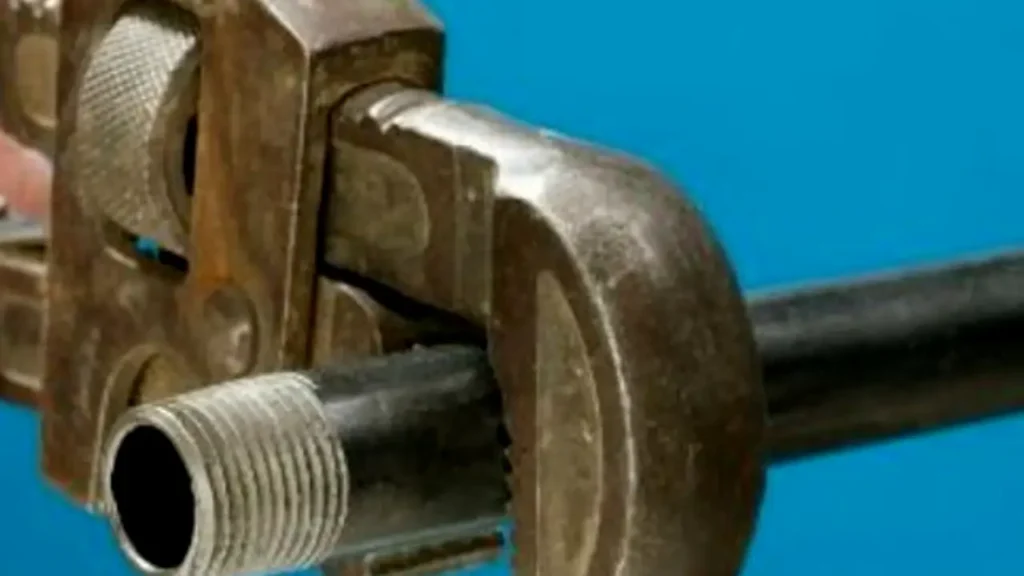
Step 3: Threading the Pipe
Select the correct die size for the pipe you’re threading. Most pipes use NPT (National Pipe Thread) threads. Attach the die to the threader and secure it tightly. Apply cutting oil generously to the pipe end to reduce friction and heat during threading. This lubrication is essential for creating clean, uniform threads.
Selecting the right die is essential for clean threads. Cutting oil will reduce friction, and heat. This will help you create clean, uniform threads.
Place the threader onto the pipe end and apply downward pressure while rotating it clockwise. Maintain a consistent rotation speed and apply steady pressure to create clean, uniform threads. Periodically, reverse the threader slightly to break off any metal shavings and prevent clogging. Continue threading until you reach the desired thread length.
Steady pressure, and rotation, will create clean threads. Reversing the threader will help prevent clogging. Thread to the desired length.
Once you’ve threaded the pipe to the desired length, remove the threader and carefully inspect the threads for any imperfections or damage. Clean the threads with a wire brush to remove any metal shavings or cutting oil. If necessary, use a thread gauge to verify the thread size and quality.
Inspect the threads to make sure they are clean, and undamaged. Use a wire brush to clean the threads. If needed, use a thread gauge to verify the thread size.
How to Cut and Thread Black Iron Pipe
Working with black iron pipe demands precision and care, especially when cutting and threading. This guide will walk you through the process, ensuring you achieve professional results with the right tools and techniques. Black iron is a durable material, but requires specific steps.
Step 1: Precise Measurement and Secure Setup
Before you make any cuts, accurately measure the required length of the black iron pipe. Use a measuring tape or ruler and mark the cutting point with a permanent marker. Double-check your measurements to avoid costly errors, as precision is paramount. Remember to account for the length of the threads you’ll be adding, particularly if you’re working with specific fittings.
You’ll want to take your time here, measuring accurately will prevent waste. Double checking your marks will save you from having to redo your work. Remember that the threaded portion will add to the overall length of the pipe.
Ensure your black iron pipe is securely clamped in a heavy-duty pipe vise to prevent movement during cutting and threading. A stable setup is crucial for safety and accuracy. Due to the hardness of black iron, wear safety glasses and heavy-duty gloves to protect yourself from metal shavings and sharp edges.
A secure clamp is vital for your safety, and the quality of your cuts. Heavy-duty safety glasses and gloves will protect you from metal shavings.
Step 2: Cutting the Black Iron Pipe
Use a pipe cutter designed for black iron or a hacksaw with a high-quality metal cutting blade. Score a line around the pipe at your marked point. If using a pipe cutter, rotate it around the pipe, gradually tightening the blade until it cuts through. Avoid excessive pressure, as this can deform the pipe. For larger diameter pipes, a hacksaw might be necessary. If using a hacksaw, maintain a square cutting angle.
A pipe cutter, or a quality hacksaw, is required for clean, straight cuts. Rotate the cutter, and tighten as you go, to prevent deforming the pipe. Hacksaws can be used for larger pipes, but take extra care to cut straight.
Once the black iron pipe is cut, use a file or deburring tool specifically designed for heavy metals to remove any sharp edges or burrs from the inside and outside of the pipe. This step is crucial for ensuring a smooth, leak-free connection. Clean the pipe thoroughly to remove any metal shavings or debris that could contaminate the system.
Deburring the pipe will prevent leaks, and contamination. Use a file, or deburring tool, to smooth the edges. Clean the pipe to remove metal shavings.
Step 3: Threading the Black Iron Pipe
Select the correct die size for the black iron pipe you’re threading. Black iron pipes typically use NPT (National Pipe Thread) threads. Attach the die to a heavy-duty threader and secure it tightly. Apply cutting oil specifically designed for black iron generously to the pipe end to reduce friction and heat during threading. This lubrication is essential for creating clean, uniform threads.
Selecting the right die is essential for clean threads. Heavy duty cutting oil will reduce friction, and heat. This will help you create clean, uniform threads.
Place the threader onto the pipe end and apply significant downward pressure while rotating it clockwise. Maintain a consistent rotation speed and apply steady, considerable pressure to create clean, uniform threads. Periodically, reverse the threader slightly to break off any metal shavings and prevent clogging. Black iron is hard, so expect to apply more force than with other pipe types. Continue threading until you reach the desired thread length.
Steady pressure, and rotation, will create clean threads. Reversing the threader will help prevent clogging. Thread to the desired length, and expect to use more force.
Once you’ve threaded the black iron pipe to the desired length, remove the threader and carefully inspect the threads for any imperfections or damage. Clean the threads with a wire brush designed for heavy metals to remove any metal shavings or cutting oil. If necessary, use a thread gauge to verify the thread size and quality.
Inspect the threads to make sure they are clean, and undamaged. Use a heavy duty wire brush to clean the threads. If needed, use a thread gauge to verify the thread size.
How to Cut and Thread Galvanized Pipe

Working with galvanized pipe requires careful attention to detail, especially when cutting and threading, to maintain its corrosion-resistant properties. This guide will walk you through the process, ensuring you achieve professional results with the right tools and techniques. Galvanized pipe has a protective coating, so extra care is needed.
Step 1: Accurate Measurement and Secure Setup
Before you begin, precisely measure the required length of the galvanized pipe. Use a measuring tape or ruler and mark the cutting point with a permanent marker. Double-check your measurements to avoid costly errors, as precision is crucial. Remember to account for the length of the threads you’ll be adding, particularly if you’re working with specific fittings.
You’ll want to take your time here, measuring accurately will prevent waste. Double checking your marks will save you from having to redo your work. Remember that the threaded portion will add to the overall length of the pipe.
Ensure your galvanized pipe is securely clamped in a pipe vise to prevent movement during cutting and threading. A stable setup is essential for safety and accuracy. Wear safety glasses and gloves to protect yourself from metal shavings and the zinc coating, which can be irritating.
A secure clamp is vital for your safety, and the quality of your cuts. Safety glasses and gloves will protect you from metal shavings and the zinc coating.
Step 2: Cutting the Galvanized Pipe
Use a pipe cutter designed for galvanized pipe or a hacksaw with a high-quality metal cutting blade. Score a line around the pipe at your marked point. If using a pipe cutter, rotate it around the pipe, gradually tightening the blade until it cuts through. Avoid excessive pressure, as this can deform the pipe. For larger diameter pipes, a hacksaw might be necessary. If using a hacksaw, maintain a square cutting angle.
A pipe cutter, or a quality hacksaw, is required for clean, straight cuts. Rotate the cutter, and tighten as you go, to prevent deforming the pipe. Hacksaws can be used for larger pipes, but take extra care to cut straight.
Once the galvanized pipe is cut, use a file or deburring tool to remove any sharp edges or burrs from the inside and outside of the pipe. This step is crucial for ensuring a smooth, leak-free connection. Clean the pipe thoroughly to remove any metal shavings or debris that could contaminate the system. Apply a zinc-rich cold galvanizing compound to the cut ends to prevent rust.
Deburring the pipe will prevent leaks, and contamination. Use a file, or deburring tool, to smooth the edges. Clean the pipe to remove metal shavings. Apply a zinc-rich compound to prevent rust.
Step 3: Threading the Galvanized Pipe
Select the correct die size for the galvanized pipe you’re threading. Galvanized pipes typically use NPT (National Pipe Thread) threads. Attach the die to the threader and secure it tightly. Apply cutting oil generously to the pipe end to reduce friction and heat during threading. This lubrication is essential for creating clean, uniform threads.
Selecting the right die is essential for clean threads. Cutting oil will reduce friction, and heat. This will help you create clean, uniform threads.
Place the threader onto the pipe end and apply downward pressure while rotating it clockwise. Maintain a consistent rotation speed and apply steady pressure to create clean, uniform threads. Periodically, reverse the threader slightly to break off any metal shavings and prevent clogging. Continue threading until you reach the desired thread length.
Steady pressure, and rotation, will create clean threads. Reversing the threader will help prevent clogging. Thread to the desired length.
Once you’ve threaded the galvanized pipe to the desired length, remove the threader and carefully inspect the threads for any imperfections or damage. Clean the threads with a wire brush to remove any metal shavings or cutting oil. Apply a zinc-rich cold galvanizing compound to the newly threaded area to maintain its corrosion resistance. If necessary, use a thread gauge to verify the thread size and quality.
Inspect the threads to make sure they are clean, and undamaged. Use a wire brush to clean the threads. Apply a zinc-rich compound to prevent rust. If needed, use a thread gauge to verify the thread size.
Pipe Thread Cutting Tools
Pipe thread cutting tools are essential for creating precise, leak-free connections in various piping systems. These tools are designed to cut threads onto the ends of pipes, allowing them to be joined with fittings, valves, and other components. Selecting the right tools ensures accurate threading, which is crucial for maintaining the integrity and safety of fluid and gas transfer systems. Proper use of these tools minimizes the risk of leaks and system failures.
Here are some common pipe thread cutting tools:
Pipe Threader (Die Stock):
A pipe threader, also known as a die stock, holds the cutting dies and provides leverage for threading pipes. It comes with a handle for manual operation and is available in various sizes to accommodate different pipe diameters. The die stock ensures consistent and accurate thread cutting, essential for creating reliable connections.
Threading Dies:
Threading dies are the cutting components that create the threads on the pipe. They come in sets with different sizes to match various pipe diameters and thread standards, such as NPT or BSPT. High-quality dies are made from hardened steel to withstand the cutting process and produce precise threads, ensuring leak-free connections.
Pipe Cutter:
A pipe cutter is used to cut pipes to the desired length before threading. It uses a cutting wheel that scores and gradually cuts through the pipe as it is rotated. This tool provides clean, straight cuts, which are essential for creating accurate threads and ensuring proper fitting connections.
Cutting Oil:
Cutting oil is a lubricant applied to the pipe and dies during the threading process. It reduces friction and heat, extending the life of the dies and producing cleaner threads. Proper lubrication prevents damage to the tools and ensures smooth, efficient threading, which is crucial for high-quality connections.
Thread Gauge:
Thread gauges are used to verify the accuracy of the cut threads, ensuring they meet the required standards. They come in various sizes and thread types to check the pitch and form of the threads. Using a thread gauge helps prevent leaks and ensures compatibility with fittings, maintaining the integrity of the piping system.
Conclusion
In conclusion, mastering the techniques for cutting and threading pipe is essential for creating secure, leak-free connections in various piping systems. Proper preparation, precise cutting, and accurate threading ensure optimal performance and longevity. Understanding the nuances of different pipe materials and thread types is crucial for successful outcomes.
Adhering to safety protocols and utilizing the correct tools minimizes risks and maximizes efficiency during the cutting and threading process. Regular practice and attention to detail enhance proficiency, leading to reliable and professional results. Proper thread engagement and sealing techniques prevent leaks and ensure system integrity.
For a comprehensive selection of high-quality pipe threads and expert guidance, choose DF Hydraulics. We offer wholesale options with diverse sizes and materials to meet your specific needs. Contact us today to explore our product offerings and ensure your piping projects operate with optimal safety and efficiency.


