
Repairing a brake line with a compression fitting offers a quick, temporary solution for leaks, especially in emergency situations. While not a permanent fix, it can restore functionality until a proper repair is possible. This guide provides a step-by-step approach to effectively using compression fittings for brake line repairs, ensuring safety and functionality.
This blog will cover the necessary steps for preparing the brake line, installing the compression fitting, and testing the repair. We’ll emphasize the importance of proper installation techniques and safety precautions. By following these guidelines, you can temporarily repair your brake line, minimizing downtime and ensuring your vehicle’s braking system remains functional.
What Is Brake Line
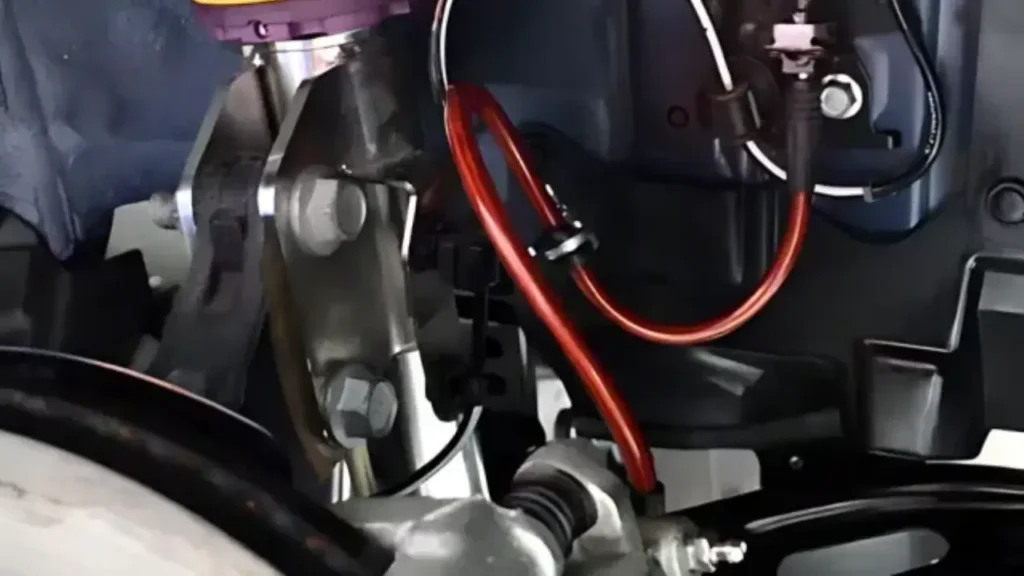
A brake line is a crucial component of a vehicle’s braking system, responsible for transmitting hydraulic pressure from the master cylinder to the wheel cylinders or calipers. These lines are designed to withstand high pressures and are typically made from durable materials like steel, stainless steel, or copper-nickel alloys to prevent leaks and ensure reliable performance. Their primary function is to deliver brake fluid, enabling the vehicle to slow down or stop when the brake pedal is pressed.
These lines can vary in length and diameter depending on the vehicle’s make and model, as well as the specific application. They are routed throughout the vehicle’s chassis, often following complex paths to reach each wheel. The integrity of brake lines is paramount for safety, as any damage or leaks can lead to a loss of braking power, posing a significant risk to the driver and passengers.
How to Repair Brake Line With Compression Fitting
Repairing a brake line with a compression fitting is a temporary fix, crucial for emergency situations, but not a long-term solution. Proper technique ensures a safe, albeit temporary, repair. This guide details the six steps for effectively using compression fittings on brake lines.
Step 1: Cutting the Damaged Section
Begin by locating the damaged section of the brake line. Use a tubing cutter to make clean, square cuts on both sides of the damaged area. Ensure the cuts are free of burrs or sharp edges, which can interfere with the compression fitting’s seal. Clean the area around the cut to remove any brake fluid or debris.
A clean, square cut is crucial for a proper seal. Burrs or uneven cuts can prevent the compression sleeve from gripping correctly, leading to leaks. Cleaning the area around the cut prevents contaminants from entering the braking system. This initial preparation ensures a more reliable temporary repair.
Inspect the brake line for any additional damage or corrosion. If the line is extensively damaged, a larger section may need replacement, or professional assistance should be sought. Ensuring the cut is clean and the line is free of damage prevents further complications and ensures a more effective repair.
Step 2: Preparing the Brake Line Ends
After cutting, ensure the brake line ends are smooth and free of any deformities. Use fine sandpaper or a deburring tool to smooth any rough edges. This ensures the compression sleeve can slide onto the line without damage. Check the inside of the brake line for any obstructions or debris and clean as necessary.
Smooth brake line ends allow the compression sleeve to seat properly, creating a tighter seal. Any deformities can prevent a proper seal and lead to leaks. Cleaning the inside of the line prevents debris from entering the braking system, which could cause further issues.
Ensure the brake line ends are perfectly round. Any oval or distorted shapes will prevent the compression fitting from sealing correctly. If necessary, use a brake line forming tool to reshape the ends. This ensures a proper fit and a more reliable temporary repair.
Step 3: Installing the Compression Fittings
Slide the compression nut and sleeve onto each end of the brake line. Ensure the sleeves are positioned correctly and the nuts are facing outward. Insert the brake line ends into the compression fitting, ensuring they are fully seated. Hand-tighten the nuts initially, then use two wrenches to tighten them securely. Tighten evenly to prevent leaks.
Proper positioning of the compression sleeve is crucial for a tight seal. Ensure the nuts are tightened evenly to prevent leaks. Over-tightening can damage the brake line or fitting, while under-tightening can lead to leaks. Use wrenches to achieve a snug fit, avoiding excessive force.
After tightening, inspect the connection for any signs of leaks. Ensure the brake line is securely held in place and the compression fitting is properly seated. If leaks are observed, tighten slightly more, but avoid over-tightening. If leaks persist, consider replacing the fitting.
Step 4: Checking the Connection
Before moving on, visually inspect the connection. Ensure the compression fitting is seated correctly and that the brake line is securely held in place. Check for any signs of leaks or damage. Gently tug on the brake line to ensure it is secure. This step is crucial for identifying any immediate issues before proceeding.
A thorough visual inspection prevents immediate leaks. Ensuring the brake line is secure prevents it from coming loose during initial testing. Gently tugging on the line tests the connection’s stability. This step verifies the initial integrity of the repair.
If any leaks or instability are detected, re-tighten the nuts or re-install the fitting. Ensure the compression fitting is properly seated and the brake line is securely held. Addressing any issues at this stage prevents complications during the final testing.
Step 5: Bleeding the Brake System
After installing the compression fitting, bleed the brake system to remove any air that may have entered during the repair. Air in the brake lines can compromise braking performance. Follow the vehicle manufacturer’s instructions for bleeding the brakes. This ensures the braking system functions correctly.
Bleeding the brakes removes air pockets that can lead to a spongy brake pedal and reduced braking efficiency. Following the manufacturer’s instructions prevents damage to the braking system. This step is crucial for restoring proper braking performance.
Ensure all brake lines are properly connected before bleeding the system. Check for any leaks during the bleeding process. Bleeding the brakes ensures a firm brake pedal and reliable braking performance.
Step 6: Testing the Repair
After bleeding the brakes, thoroughly test the repair. Apply pressure to the brake pedal and inspect the connection for leaks. If possible, perform a pressure test to ensure the system can withstand maximum operating pressure. Verify that the brakes engage and disengage smoothly. This testing confirms the repair’s effectiveness and ensures immediate safety.
Testing simulates real-world driving conditions, ensuring the repair is effective. Check for leaks under pressure to verify the connection’s integrity. Ensure the brakes respond correctly and the vehicle stops safely.
Remember, a compression fitting repair is temporary. Schedule a professional repair as soon as possible to replace the damaged section with a properly flared brake line and fittings. Regular inspections of brake lines are crucial. If there is any doubt about the integrity of the repair, do not drive the vehicle.
When to Use Compression Fittings for Brake Line Repairs

Compression fittings offer a quick and convenient solution for brake line repairs, but they are not suitable for all situations. Understanding when to use them is crucial for ensuring safety and reliability. Here are the scenarios where compression fittings can be considered:
Emergency Repairs
Compression fittings are ideal for emergency repairs when a brake line leak occurs and immediate action is necessary. They allow you to quickly patch the damaged section, enabling you to drive the vehicle safely to a repair shop. This is particularly useful when you’re stranded and need a temporary fix to get moving.
Temporary Fixes
Compression fittings are best used as temporary fixes, not permanent solutions. They provide a quick way to restore braking function until a proper repair can be performed. This is useful when you need to use the vehicle temporarily before getting it to a mechanic for a more durable repair.
Low-Pressure Systems
Compression fittings are generally suitable for low-pressure brake systems or sections of the system that experience less pressure. They can be used in situations where the repair is not subjected to extreme pressure variations or high-stress conditions. However, high-pressure systems they should be avoided.
Situations with Limited Tools
When you have limited access to specialized tools like flaring tools, compression fittings offer a convenient alternative. They can be installed with basic tools, making them suitable for on-the-go repairs or situations where you don’t have access to a full toolkit.
How to Use Compression Fittings on Brake Line
Using compression fittings on brake lines is a temporary solution for quick fixes, especially in emergency situations. While not a permanent repair, it can help you get to a repair shop safely. Here’s a six-step guide on how to use compression fittings on brake lines:
Step 1: Cut the Damaged Section
Begin by locating the damaged section of the brake line. Use a tubing cutter to make clean, square cuts on both sides of the damaged area. Ensure the cuts are free of burrs or sharp edges. Clean the area around the cut to remove any brake fluid or debris. This initial step sets the foundation for a secure, temporary repair.
A clean, square cut is essential for a proper seal. Burrs or uneven cuts can prevent the compression sleeve from gripping correctly, leading to leaks. Cleaning the surrounding area minimizes contamination risks, ensuring a cleaner working environment. Inspect the remaining brake line for further damage or corrosion, which might necessitate a more extensive repair.
Step 2: Prepare the Brake Line Ends
After cutting, ensure the brake line ends are smooth and free of deformities. Use fine sandpaper or a deburring tool to smooth any rough edges. This ensures the compression sleeve can slide onto the line without damage. Check the inside of the brake line for any obstructions or debris and clean as necessary. Proper preparation of the ends is crucial for a reliable seal.
Smooth brake line ends allow the compression sleeve to seat properly, creating a tighter seal. Deformities or rough edges can compromise the seal, leading to leaks. Cleaning the inside of the line prevents debris from entering the braking system, which could cause further issues. Ensure the brake line ends are perfectly round to prevent sealing problems.
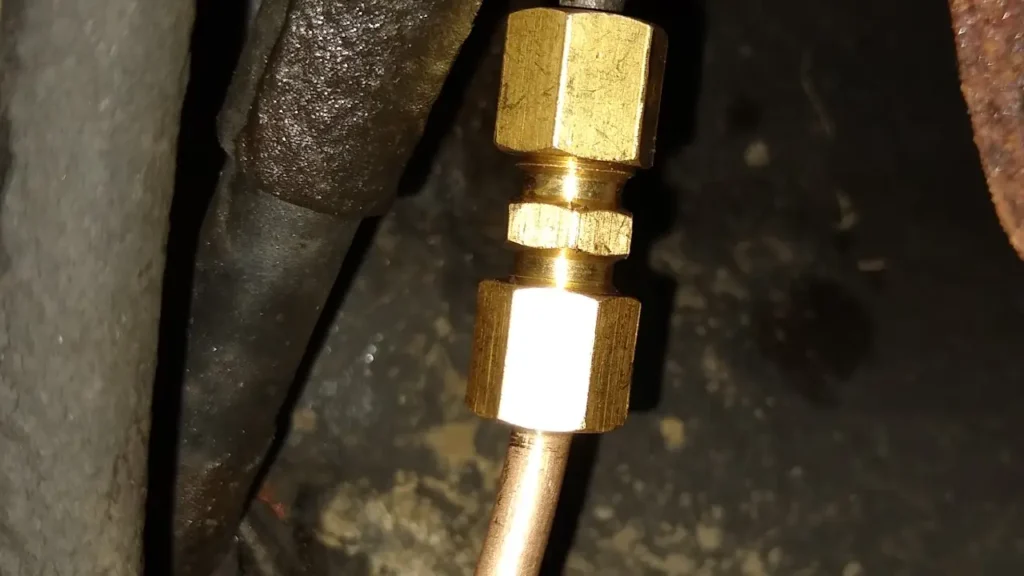
Step 3: Install the Compression Fittings
Slide the compression nut and sleeve onto each end of the brake line. Ensure the sleeves are positioned correctly and the nuts are facing outward. Insert the brake line ends into the compression fitting, ensuring they are fully seated. Hand-tighten the nuts initially, then use two wrenches to tighten them securely. Tighten evenly to prevent leaks, achieving a snug fit without over-tightening.
Proper positioning of the compression sleeve is crucial for a tight seal. Ensure the nuts are tightened evenly to prevent leaks. Over-tightening can damage the brake line or fitting, while under-tightening can lead to leaks. Using two wrenches provides leverage for a secure fit. Inspect the connection for any signs of leaks after tightening.
Step 4: Check the Connection
Visually inspect the connection to ensure the compression fitting is seated correctly and the brake line is securely held in place. Check for any signs of leaks or damage. Gently tug on the brake line to ensure it is secure. This step is crucial for identifying any immediate issues before proceeding.
A thorough visual inspection prevents immediate leaks. Ensuring the brake line is secure prevents it from coming loose during initial testing. Gently tugging on the line tests the connection’s stability. If any leaks or instability are detected, re-tighten the nuts or re-install the fitting. Ensure proper seating and secure holding to prevent complications during testing.
Step 5: Bleed the Brake System
After installing the compression fitting, bleed the brake system to remove any air that may have entered during the repair. Air in the brake lines can compromise braking performance. Follow the vehicle manufacturer’s instructions for bleeding the brakes. This ensures the braking system functions correctly and restores proper braking performance.
Bleeding the brakes removes air pockets that can lead to a spongy brake pedal and reduced braking efficiency. Following the manufacturer’s instructions prevents damage to the braking system. Ensure all brake lines are properly connected before bleeding. Check for leaks during the bleeding process to ensure a firm brake pedal and reliable braking performance.
Step 6: Test the Repair
Thoroughly test the repair by applying pressure to the brake pedal and inspecting the connection for leaks. If possible, perform a pressure test to ensure the system can withstand maximum operating pressure. Verify that the brakes engage and disengage smoothly. This testing confirms the repair’s effectiveness and ensures immediate safety.
Testing simulates real-world driving conditions, ensuring the repair is effective. Check for leaks under pressure to verify the connection’s integrity. Ensure the brakes respond correctly and the vehicle stops safely. Remember, a compression fitting repair is temporary. Schedule a professional repair as soon as possible to replace the damaged section with a properly flared brake line and fittings.
Is It Legal to Use Compression Fittings on Brake Lines
The legality of using compression fittings on brake lines is a complex issue with variations depending on local laws and regulations.
Safety Concerns:
- Brake systems operate under high pressure, and compression fittings are generally not designed to consistently withstand these conditions. This poses a significant safety risk, as a failure could lead to brake fluid loss and loss of braking power.
- Because of these safety concerns, many jurisdictions have regulations that disallow, or strongly discorage the long term use of these fittings.
Legal and Regulatory Variations:
- Regulations regarding brake line repairs vary significantly by jurisdiction. Some regions explicitly prohibit the use of compression fittings on brake lines in vehicles intended for public roads.
- Vehicle inspections in many areas may fail a vehicle with brake line repairs made using compression fittings.
- The use of compression fittings is more accepted in off road applications, or for temporary testing of brake systems.
It is important to remember that using compression fittings on brake lines, especially in vehicles used on public roads, can create very dangerous situations. Because of this, when possible, properly flared brake line fittings should be used instead.
Conclusion
In conclusion, repairing a brake line with a compression fitting offers a temporary solution for leaks, especially in emergency situations. However, it’s crucial to acknowledge that compression fittings are not a permanent fix for high-pressure braking systems. Proper installation and testing are vital to ensure immediate safety, but long-term solutions should always be pursued.
This method provides a quick way to restore braking function, allowing you to move the vehicle safely to a repair shop. However, it’s essential to understand that compression fittings can fail under sustained high pressure, posing a risk to vehicle safety. A permanent repair, involving flaring and proper fittings, is necessary.
For reliable and durable brake fittings, including those for permanent repairs, request a quote from DF Hydraulics today. We offer a comprehensive range of high-quality fittings, ensuring safe and efficient braking systems. Contact us to discuss your needs and benefit from our expert services.

