
Threading pipe is a fundamental skill for anyone working with plumbing, gas, or industrial piping systems. Proper threading ensures secure, leak-free connections, preventing costly repairs and potential hazards. Understanding the process and using the right tools are crucial for achieving accurate and reliable results.
This guide provides a step-by-step approach to threading pipe, covering essential tools, techniques, and safety considerations. Whether you’re a DIY enthusiast or a professional tradesperson, mastering pipe threading is vital for creating durable and efficient piping systems.
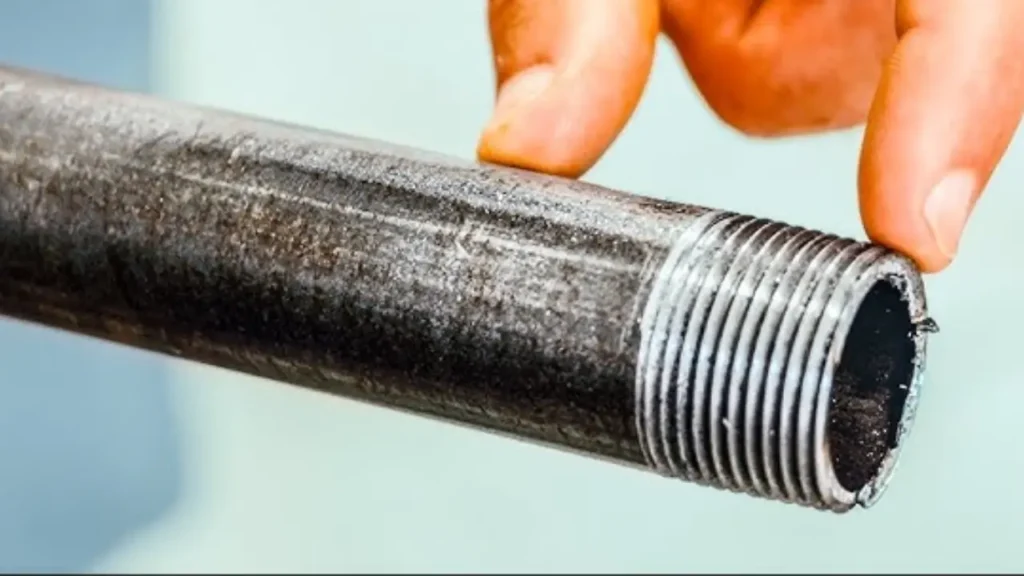
What Is a Thread Pipe
A threaded pipe is a pipe fitted with screw threads at one or both ends, designed to connect with other pipes, fittings, or valves to create a piping system for transporting fluids or gases. These threads, typically tapered or straight, provide a mechanical means of joining components, often creating a pressure-tight seal. Threaded pipes are widely used in plumbing, industrial, and construction applications due to their ease of assembly and disassembly.
How to Thread Pipe
Knowing how to thread a pipe is a fundamental skill for anyone working with plumbing, gas, or hydraulic systems. Proper threading ensures leak-free connections and prevents costly repairs.
This guide provides a step-by-step approach to mastering pipe threading techniques.
Step 1: Preparing the Pipe
Before you begin, ensure the pipe is cut to the desired length and deburred to remove any sharp edges or metal shavings. Clean the pipe’s end with a cloth to remove any dirt or debris that could interfere with the threading process. Secure the pipe in a pipe vise, ensuring it’s held firmly to prevent movement during threading.
Preparing the pipe correctly is crucial for achieving clean and accurate threads. A secure setup, and a clean pipe end, are essential for a good result. This prevents damage to the threading tools, and ensures a proper seal.
Step 2: Selecting the Threading Dies
Choose the appropriate threading dies for the pipe size and thread type you need. Common thread types include NPT (National Pipe Thread) and BSPT (British Standard Pipe Taper). Ensure the dies are sharp and in good condition to create clean, well-defined threads. Insert the dies into the threading tool, following the manufacturer’s instructions.
Selecting the right dies is vital for creating compatible threads. Sharp, well maintained, dies will produce clean threads, and extend the life of your tooling. The correct dies are essential for a good, leak free, seal.
Step 3: Threading the Pipe
Apply cutting oil to the pipe’s end and the threading dies to lubricate the process and prevent overheating. Begin threading by placing the threading tool onto the pipe and turning it clockwise. Apply consistent pressure and maintain a steady turning motion to create even threads. Continue threading until the desired thread length is achieved.
Lubrication is key to smooth threading and preventing damage to the pipe and dies. Consistent pressure, and a steady turning motion, are very important. Do not over thread the pipe, and follow the manufacturer’s directions.
Step 4: Inspecting and Cleaning the Threads
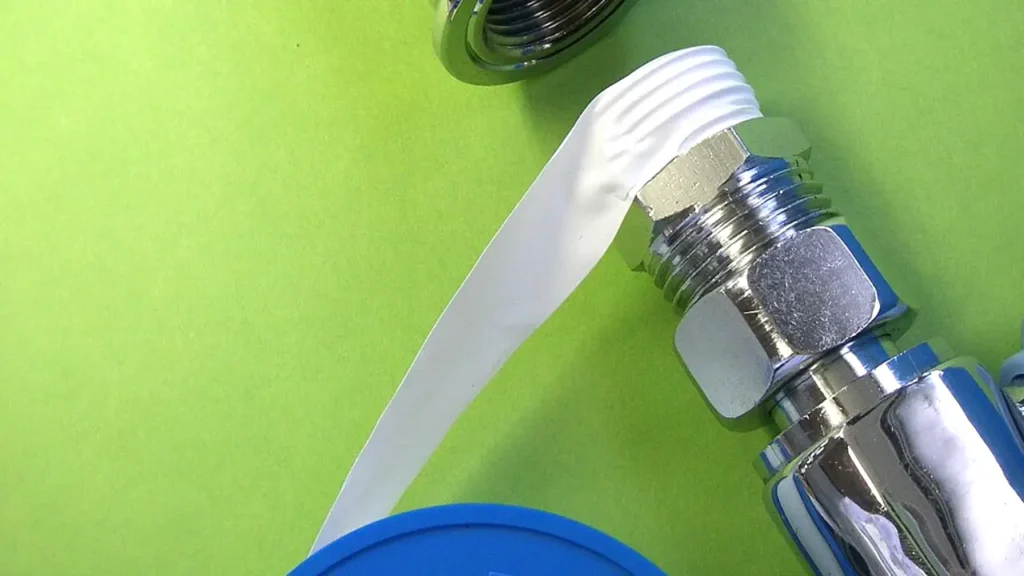
After threading, remove the threading tool and inspect the threads for any imperfections or damage. Clean the threads with a wire brush to remove any metal shavings or debris. Apply thread sealant or Teflon tape to the threads before connecting the pipe to ensure a leak-free seal.
Inspecting the threads ensures a proper seal. Cleaning the threads removes debris, that can cause leaks. Thread sealant, or teflon tape, will help ensure a leak free connection.
How to Thread Galvanized Pipe
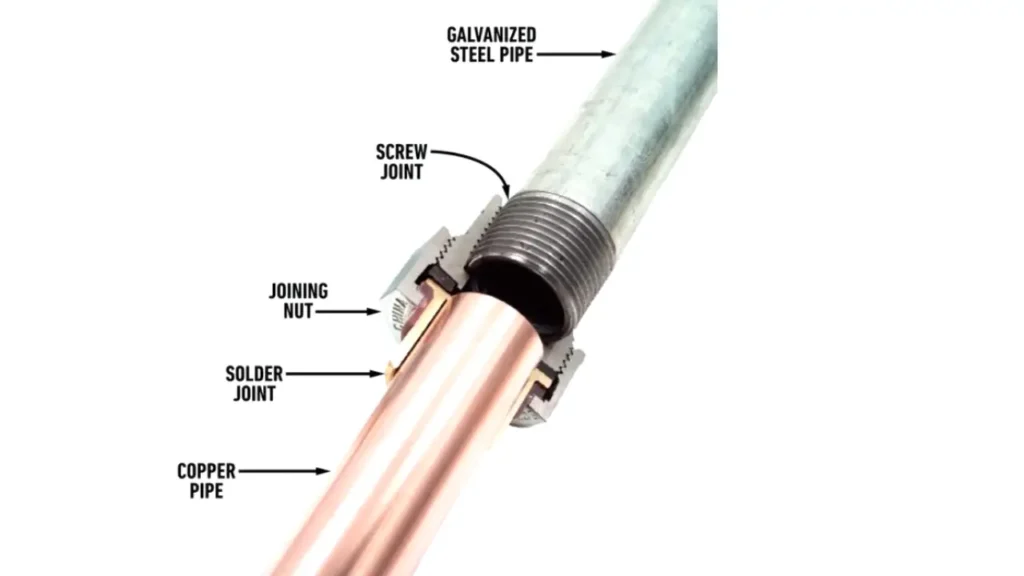
Threading galvanized pipe demands precision and care due to its protective coating, which, if damaged, can lead to corrosion. This step-by-step guide ensures you create clean, functional threads while preserving the pipe’s integrity.
Here’s a comprehensive approach to threading galvanized steel pipe.
Step 1: Preparation and Marking
Before you begin, secure the galvanized pipe firmly in a pipe vise to prevent movement during threading. Ensure the pipe extends far enough from the vise to allow ample room for threading. Clean the pipe end with a wire brush to remove any dirt or debris that could interfere with the threading process. Use a marker to indicate the desired thread length, ensuring you have enough threads for a secure connection.
Proper preparation is vital to achieve clean, accurate threads. A secure grip, and clean pipe, will ensure a better outcome. Marking the correct thread length prevents over-threading and ensures a tight seal.
Step 2: Selecting and Setting Up the Threading Tools
Choose a high-quality pipe threader with the correct die size for the galvanized pipe you are working with. Galvanized pipes typically use NPT (National Pipe Thread) threads. Attach the die to the threader and ensure it is securely locked in place. Apply cutting oil generously to the pipe end and the die to reduce friction and heat during threading. This lubrication is crucial for preventing damage to both the pipe and the threading tools.
Using the correct tools, and plenty of cutting oil, are crucial for threading galvanized pipe. The oil reduces friction, and heat, which helps with clean cuts.
Step 3: Threading the Pipe
Begin threading by placing the threader onto the pipe end and applying downward pressure while rotating it clockwise. Maintain a consistent rotation speed and apply steady pressure to create clean, uniform threads. Periodically, reverse the threader slightly to break off any metal shavings and prevent clogging. Continue threading until you reach the marked length on the pipe.
Consistent pressure, and rotation, create uniform threads. Backing off the threader prevents clogging, and ensures clean threads.
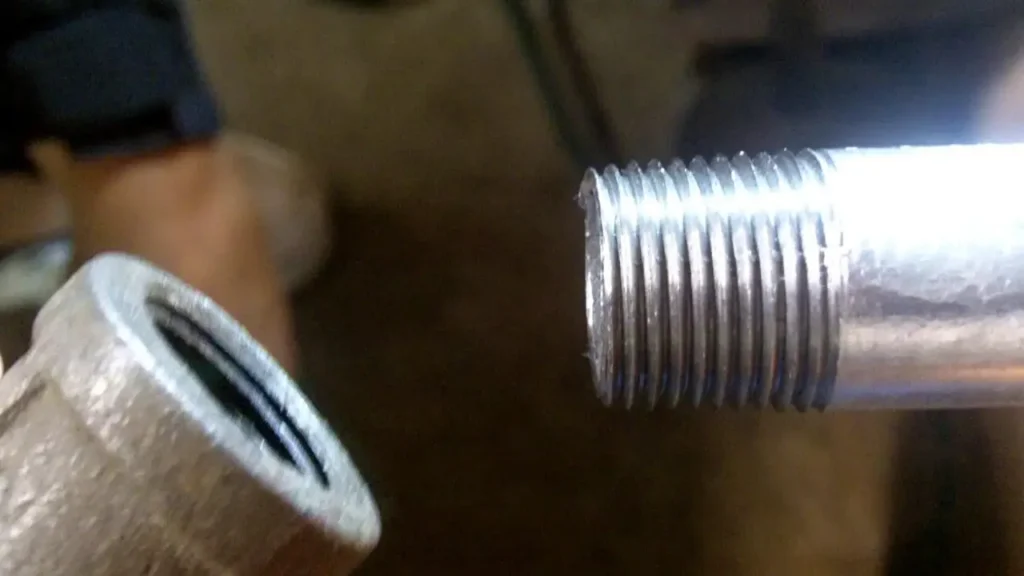
Step 4: Inspecting and Cleaning the Threads
Once you’ve threaded the pipe to the desired length, remove the threader and carefully inspect the threads for any imperfections or damage. Clean the threads with a wire brush to remove any metal shavings or cutting oil. If necessary, use a thread gauge to verify the thread size and quality. Apply a rust-preventative coating to the newly threaded area to protect it from corrosion.
Inspecting, and cleaning the threads, ensures a good connection. A rust preventative coating protects the newly cut threads.
How to Thread Gas Pipe
Threading gas pipe requires meticulous attention to detail due to the critical nature of gas connections. This step-by-step guide ensures you create precise, leak-free threads while adhering to safety standards. Here’s a comprehensive approach to threading gas pipe.
Step 1: Secure Setup and Precise Marking
Begin by securely clamping the gas pipe in a pipe vise, ensuring it’s immobile during threading. The pipe should extend sufficiently from the vise to allow for threading. Thoroughly clean the pipe end with a wire brush to eliminate any debris that could impede threading. Use a permanent marker to accurately mark the desired thread length, ensuring you create enough threads for a robust, leak-proof connection.
A secure setup is paramount for safe and accurate threading. Clean pipes, and precise markings, help prevent leaks. Marking ensures proper thread length.
Step 2: Tool Selection and Lubrication
Select a high-quality pipe threader with the correct die size for the gas pipe, typically NPT (National Pipe Thread). Securely attach the die to the threader and double-check its alignment. Apply generous amounts of specialized cutting oil to the pipe end and the die. This lubrication is essential for minimizing friction and heat, which are crucial for creating clean threads and preventing damage to the pipe and threading tools.
Using the right tools, and generous amounts of cutting oil, are vital for threading gas pipe. Cutting oil reduces friction, and heat, ensuring clean threads.
Step 3: Executing the Threading Process
Place the threader onto the pipe end and apply consistent downward pressure while rotating it clockwise. Maintain a steady rotation speed to ensure uniform thread formation. Periodically, reverse the threader slightly to clear metal shavings, preventing obstructions and ensuring clean threads. Continue threading until you reach the marked length on the pipe.
Consistent pressure, and rotation, ensures clean threads. Reversing the threader prevents obstructions. Thread to the marked length for a good seal.
Step 4: Thorough Inspection and Cleaning
After threading, remove the threader and meticulously inspect the threads for any imperfections or damage. Clean the threads thoroughly with a wire brush to remove any metal shavings and residual cutting oil. Use a thread gauge to verify the thread size and quality. For gas pipes, it’s crucial to ensure the threads are perfectly formed to prevent leaks. Apply a corrosion inhibitor to the newly threaded area to safeguard against rust and ensure long-term integrity.
Thorough inspection, and cleaning, are essential for gas pipes. A corrosion inhibitor protects new threads. Use a thread gauge to verify thread quality.
How to Thread a Pipe Without a Pipe Threader
Threading a pipe without a dedicated pipe threader requires resourcefulness and careful execution. While a pipe threader is the ideal tool, alternative methods can create functional threads in a pinch. This guide outlines a technique to thread a pipe without a traditional pipe threader.
Step 1: Secure Setup and Precise Marking
Begin by securely clamping the pipe in a pipe vise, ensuring it’s immobile during the process. The pipe should extend sufficiently from the vise to allow for threading. Thoroughly clean the pipe end with a wire brush to eliminate any debris that could impede threading. Use a permanent marker to accurately mark the desired thread length, ensuring you create enough threads for a robust connection.
A stable setup is crucial for safe and effective threading. Clean pipes, and precise markings, are vital. Marking ensures proper thread length.
Step 2: Selecting and Preparing Alternative Tools
Choose a high-quality die set that matches the pipe’s thread size, typically NPT (National Pipe Thread). Securely mount the die in a die stock or a T-handle wrench designed for threading. Apply generous amounts of specialized cutting oil to the pipe end and the die. This lubrication is essential for minimizing friction and heat, which are crucial for creating clean threads and preventing damage to the pipe and tools.
Using the correct die set, and plenty of cutting oil, are essential. Die stock, or a T-handle wrench, is required. Cutting oil reduces friction, and heat, ensuring clean threads.
Step 3: Executing the Threading Process Manually
Place the die onto the pipe end and apply consistent downward pressure while rotating it clockwise. Maintain a steady rotation speed to ensure uniform thread formation. Due to the lack of a dedicated threader, this process will require more force and precision. Periodically, reverse the die slightly to clear metal shavings, preventing obstructions and ensuring clean threads. Continue threading until you reach the marked length on the pipe.
Manual threading requires more force and precision. Consistent pressure, and rotation, ensures clean threads. Reversing the die prevents obstructions. Thread to the marked length for a good seal.
Step 4: Thorough Inspection and Refinement
After threading, remove the die and meticulously inspect the threads for any imperfections or damage. Clean the threads thoroughly with a wire brush to remove any metal shavings and residual cutting oil. Use a thread gauge to verify the thread size and quality. If needed, carefully refine the threads with a file or thread chaser to ensure a proper fit. Apply a corrosion inhibitor to the newly threaded area to safeguard against rust and ensure long-term integrity.
Thorough inspection, and refinement, are essential. Use a thread gauge to verify thread quality. A corrosion inhibitor protects new threads.
Conclusion
In conclusion, mastering pipe threading is essential for creating secure and leak-free connections in various piping systems. Understanding the proper tools, techniques, and safety precautions ensures successful threading, preventing costly leaks and system failures. Careful preparation, precise cutting, and thorough inspection are crucial for achieving optimal results.
Regular practice and attention to detail are key to developing proficiency in pipe threading. Knowing the nuances of different pipe materials and thread types allows for versatile application across diverse projects. Maintaining tools and adhering to safety guidelines ensures longevity and reliability in your piping systems.
For a comprehensive selection of high-quality hydraulic threads and expert guidance, choose Kingdaflex. We offer wholesale options with diverse sizes and materials to meet your specific needs. Contact us today to explore our product offerings and ensure your hydraulic systems operate with optimal safety and efficiency.


