
Properly tightened brake line fittings are essential for a safe and functional braking system. Leaks can lead to brake failure, posing significant risks. This guide provides a step-by-step approach to tightening these fittings, ensuring secure connections and preventing potential hazards. Understanding the correct techniques and tools is crucial for both DIY enthusiasts and professional mechanics.
This blog will cover the necessary preparations, tools, and procedures to tighten brake line fittings effectively. We’ll explore how to align fittings, use a flare nut wrench, and test for leaks, ensuring you can perform this critical task with confidence. By following these guidelines, you can maintain your vehicle’s braking system, ensuring safety on the road.
When to Tighten Brake Line Fittings

You should tighten brake line fittings whenever you’re working on any part of your vehicle’s braking system. This includes after replacing brake lines, calipers, master cylinders, or any other component that involves disconnecting or reconnecting brake lines. Additionally, it’s crucial to tighten fittings after any repair or maintenance work where brake lines might have been disturbed, even slightly. Regular inspections should also include checking the tightness of these fittings to ensure they haven’t loosened over time due to vibrations or temperature changes.
Furthermore, any time you observe signs of brake fluid leakage, you should immediately inspect and tighten the affected fittings. Leaks can compromise your braking system’s performance, posing a serious safety risk. Even if you don’t notice visible leaks, it’s a good practice to periodically check the tightness of brake line fittings as part of your routine vehicle maintenance. This preventative measure helps ensure the long-term reliability and safety of your braking system.
How to Tighten Brake Line Fittings
Properly tightening brake line fittings is crucial for preventing leaks and ensuring your vehicle’s braking system functions safely. Incorrect tightening can lead to leaks or damage, compromising braking performance. This guide outlines the essential steps to ensure secure and leak-free connections.
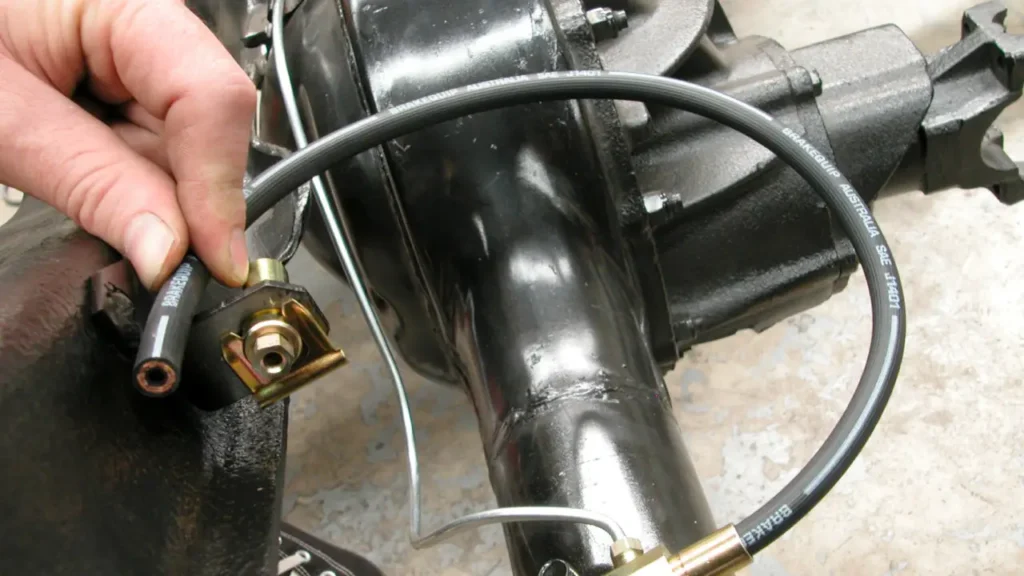
Step 1: Prepare the Fittings and Brake Lines
Before tightening, ensure the brake line fittings and lines are clean and free of debris. Inspect for any damage or corrosion that could compromise the seal. Lightly lubricate the threads with brake fluid to facilitate smooth tightening and prevent seizing. This preparation ensures a secure and leak-free connection.
You should always start with clean components to avoid introducing contaminants into the braking system. Debris can interfere with the sealing surface, leading to leaks. Inspecting for damage prevents you from tightening a compromised fitting, which could fail under pressure. Lubricating the threads reduces friction and prevents damage during tightening.
Step 2: Align and Hand-Tighten the Fittings
Carefully align the brake line fitting with the receiving component, ensuring the threads are properly engaged. Begin tightening the fitting by hand, turning it clockwise. Ensure the fitting is straight and not cross-threaded, as this can damage the threads and lead to leaks. Hand-tightening ensures the fitting is properly seated before using tools.
Proper alignment prevents cross-threading, which can ruin the threads and create leaks. You should take your time and ensure the fitting is straight before applying any force. Hand-tightening allows you to feel if the threads are engaging correctly, preventing damage. This step is crucial for a secure and leak-free connection.
Step 3: Use a Flare Nut Wrench
Use a flare nut wrench, also known as a line wrench, to tighten the brake line fitting. This wrench is designed to grip the fitting securely without rounding the corners, which can happen with standard wrenches. Tighten the fitting to the manufacturer’s specified torque, if available. If torque specifications are unavailable, tighten until snug, but avoid over-tightening.
A flare nut wrench provides a secure grip, preventing damage to the fitting. You should avoid using standard wrenches, as they can round the fitting’s corners, making it difficult to tighten or loosen. Over-tightening can damage the threads or crush the fitting, leading to leaks. Use a torque wrench for accurate tightening when possible.
Step 4: Test for Leaks
After tightening the fittings, thoroughly test the braking system for leaks. Apply pressure to the brake pedal and inspect all connections for any signs of leakage. If possible, perform a pressure test to ensure the system can withstand the maximum operating pressure. Verify that the brakes engage and disengage smoothly and effectively. This testing confirms the integrity of your work.
You should always test the braking system after tightening any fittings. Checking for leaks under pressure simulates real-world driving conditions and ensures the connections are secure. Verify that the brake pedal feels firm and that the vehicle stops safely. This final step is crucial for ensuring your safety and the safety of others on the road.
How Tight Should Brake Line Fittings Be
The tightness of brake line fittings is crucial for preventing leaks and ensuring a safe, functional braking system. Over-tightening can damage the fittings or brake lines, while under-tightening can lead to leaks and compromised braking performance.
The ideal tightness is snug, but not excessively so, and often depends on the fitting type and manufacturer specifications. It’s best to use a torque wrench when possible to achieve the precise tightness.
Here are some important considerations:
- Manufacturer Specifications: Always refer to the vehicle or fitting manufacturer’s specifications for torque values. These values provide the most accurate guidance for tightening.
- Flare Nut Wrench: Use a flare nut wrench (line wrench) to prevent rounding the fitting’s corners. Standard wrenches can damage the fittings, leading to leaks or difficulties in future maintenance.
- Feel and Experience: If torque specifications are unavailable, tighten the fitting until it feels snug. Avoid over-tightening, which can strip threads or damage the fitting.
- Leak Testing: After tightening, thoroughly test the system for leaks by applying pressure to the brake pedal and inspecting all connections.
- Material Considerations: Fittings made of softer metals, like brass, require less torque than those made of steel.
Achieving the correct tightness ensures a reliable seal without damaging the components, maintaining the integrity of your braking system.
Conclusion
In conclusion, properly tightening brake line fittings is essential for maintaining your vehicle’s braking system integrity and ensuring road safety. Understanding the correct techniques, using the appropriate tools like flare nut wrenches, and adhering to manufacturer specifications are crucial. Avoiding over-tightening and thoroughly testing for leaks are vital steps.
The right tightness prevents both leaks and damage, ensuring reliable brake performance. Regular inspections and timely adjustments of brake line fittings contribute to a safe driving experience. By following these guidelines, you can confidently maintain your vehicle’s braking system, minimizing risks and ensuring optimal function.
For high-quality wholesale hydraulic fittings, including brake line fittings, tailored to your specific needs, request a quote from DF Hydraulics today. We offer a comprehensive range of durable and reliable fittings, ensuring secure and efficient connections. Get in touch to discuss your requirements and benefit from our expert services.


