Leaky pipe fittings can disrupt fluid transfer systems, causing damage and inefficiency. Addressing these leaks promptly is essential to maintain system integrity. This guide explores various methods to seal leaky pipe fittings, from simple DIY solutions to professional techniques. Understanding the causes of leaks and the appropriate sealing methods can prevent costly repairs and downtime.
Effective sealing involves selecting the right materials and techniques based on the type of fitting, the fluid or gas being conveyed, and the operating conditions. Whether you’re dealing with threaded connections, compression fittings, or welded joints, this guide provides practical steps to ensure a reliable and leak-free seal.
Why Hydraulic Fittings Leaks
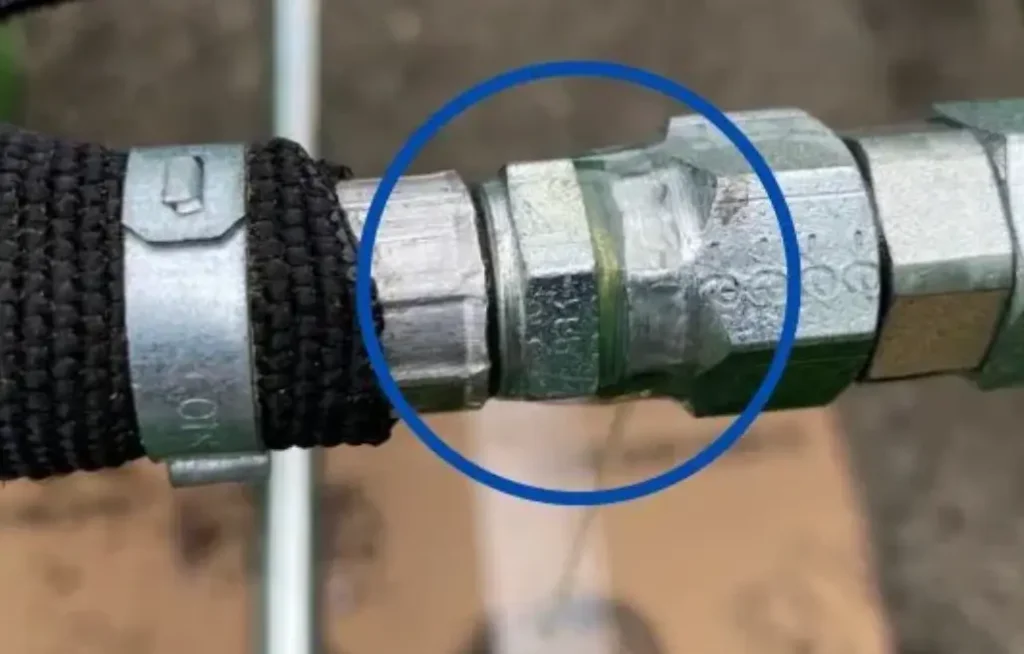
Hydraulic fittings can leak due to a variety of factors, often stemming from improper installation, wear and tear, or environmental conditions. Incorrect tightening during installation can lead to either under-tightening, which fails to create a proper seal, or over-tightening, which can damage the fitting or sealing components. Similarly, vibrations and pressure fluctuations within the hydraulic system can gradually loosen fittings over time, compromising their integrity.
Additionally, factors like temperature extremes, chemical exposure, and physical damage can contribute to leaks. Seals and O-rings, which are crucial for maintaining a leak-free connection, can degrade or crack due to age or harsh environments. Material incompatibility with the hydraulic fluid can also cause fittings to corrode or deteriorate.
Improper Installation:
- Under-tightening: Fails to create a proper seal.
- Over-tightening: Damages fitting or sealing components.
Wear and Tear:
- Vibrations: Loosen fittings over time.
- Pressure fluctuations: Stress connections, leading to leaks.
Environmental Factors:
- Temperature extremes: Degrade sealing materials.
- Chemical exposure: Corrodes or deteriorates fittings.
- Physical Damage: impacts and dents.
Material Degradation:
- Seal or O-Ring failure: Cracking and aging.
- Material Incompatibility: corrosion.
How to Seal a Leaky Pipe Fitting?

Addressing a leaky pipe fitting promptly is essential to prevent fluid loss and potential damage. The sealing process varies depending on the fitting type and the severity of the leak. Here’s a step-by-step guide to effectively seal a leaky pipe fitting:
Step 1. Identify the Leak Source and Fitting Type
Before attempting any repairs, accurately pinpoint the leak’s origin. Thoroughly inspect the fitting and surrounding area to determine where the leak is originating. This step is crucial, as a leak might appear to come from one area but originate elsewhere. Once the leak source is identified, determine the fitting type (e.g., threaded, compression, flared). Understanding the fitting type is essential for selecting the appropriate sealing method and materials.
Different fitting types require different sealing approaches. Threaded fittings often benefit from thread sealants or Teflon tape, while compression fittings may need tightening or component replacement. Flared fittings might necessitate re-flaring or replacement of the flared end. Incorrectly identifying the leak source or fitting type can lead to ineffective repairs and potential system failures. Accurate identification is paramount.
Step 2. Prepare the Fitting and Surrounding Area
After identifying the leak source and fitting type, prepare the fitting and surrounding area for repair. This involves cleaning the fitting and adjacent pipes to remove any dirt, debris, or old sealant that could interfere with the new seal. Use a clean cloth or brush to ensure the surfaces are free from contaminants. If necessary, lightly sand the surfaces to create a better bonding surface for sealants or tapes.
Disassemble the fitting if required for cleaning or sealant application. For threaded fittings, remove any old thread sealant or Teflon tape from the threads. Ensure the threads are clean and undamaged. For compression or flared fittings, inspect the components for damage or wear. Clean or replace any damaged parts. Proper preparation is essential for a successful seal and prevents future leaks.
Step 3. Apply the Appropriate Sealing Method
Select and apply the appropriate sealing method based on the fitting type and the severity of the leak. For threaded fittings, apply thread sealant or Teflon tape to the male threads. Wrap Teflon tape clockwise, ensuring it covers all threads. Apply thread sealant evenly, following the manufacturer’s instructions. For compression fittings, tighten the nut or replace the compression ring if damaged. Ensure the fitting is properly aligned before tightening.
For flared fittings, re-flare the pipe end if necessary, or replace the flared end if damaged beyond repair. Ensure the flared end is properly seated and tightened. For leaks at the fitting body, consider using epoxy putty or a pipe repair clamp. Follow the manufacturer’s instructions for application and curing time. Applying the correct sealing method ensures a reliable and long-lasting repair.
Step 4. Test the Repaired Fitting
After applying the sealing method, test the repaired fitting to ensure the leak is resolved. Reassemble the system and pressurize it to the operating pressure. Carefully inspect the fitting and surrounding area for any signs of leaks. Use a dry cloth to check for moisture or fluid seepage. If a leak persists, re-evaluate the repair and consider alternative sealing methods.
If the fitting holds pressure without leaks, run the system under normal operating conditions for a period of time to ensure the repair’s durability. Monitor the fitting for any signs of leakage or deterioration. Proper testing and monitoring are essential to ensure the repair’s effectiveness and prevent future leaks.
How to Seal a Leaking Compression Fitting
Addressing a leak in a compression fitting requires a focused approach, as these fittings rely on mechanical compression for their seal. The key is to identify the cause of the leak and apply the correct repair method. Here’s a step-by-step guide to effectively seal a leaking compression fitting:
Step 1. Identify the Leak Source and Assess the Fitting
Begin by precisely locating where the leak is originating from within the compression fitting. Carefully examine the nut, compression ring (ferrule), and the pipe itself for any signs of damage or misalignment. Determine if the leak is occurring at the nut, where the pipe enters the fitting, or along the pipe within the fitting’s compression zone. Understanding the leak’s origin helps determine if tightening, component replacement, or pipe repair is needed.
Assess the condition of the compression fitting. Check for any cracks, corrosion, or deformation in the nut or fitting body. Inspect the compression ring (ferrule) for signs of damage or improper seating. Ensure the pipe is properly inserted and not damaged or deformed within the fitting. Accurate diagnosis is crucial for selecting the appropriate repair method and preventing recurrence.
Step 2. Prepare the Fitting and Pipe
Before attempting any repairs, thoroughly clean the compression fitting and the pipe. Remove any dirt, debris, or old sealant that could interfere with the new seal. Use a clean cloth or brush to ensure the surfaces are free from contaminants. If necessary, lightly sand the pipe’s surface to create a better grip for the compression ring. Disassemble the fitting if required for cleaning or inspection.
Inspect the pipe for any damage or scratches within the compression zone. Ensure the pipe is cut squarely and free from burrs. If the pipe is damaged, cut it back to a clean section. Check the compression ring (ferrule) for proper orientation and ensure it is not damaged or distorted. Proper preparation minimizes the risk of future leaks and ensures a successful seal.
Step 3. Apply the Appropriate Sealing Method
For leaks occurring at the nut, tighten the nut using a wrench. Ensure the fitting is properly aligned and tighten the nut evenly to avoid distortion. If tightening does not resolve the leak, disassemble the fitting and inspect the compression ring (ferrule) for damage. Replace the compression ring if necessary. Apply a small amount of thread sealant to the threads of the nut before reassembling the fitting.
For leaks occurring along the pipe within the fitting’s compression zone, disassemble the fitting and inspect the pipe and compression ring (ferrule). If the pipe is damaged, cut it back to a clean section. Replace the compression ring if necessary. Ensure the pipe is properly inserted and the compression ring is correctly positioned before tightening the nut. Proper application of the sealing method ensures a reliable and leak-free connection.
Step 4. Test the Repaired Fitting
After applying the sealing method, test the repaired compression fitting to ensure the leak is resolved. Reassemble the system and pressurize it to the operating pressure. Carefully inspect the fitting and surrounding area for any signs of leaks. Use a dry cloth to check for moisture or fluid seepage. If a leak persists, re-evaluate the repair and consider alternative sealing methods, such as replacing the entire fitting.
If the fitting holds pressure without leaks, run the system under normal operating conditions for a period of time to ensure the repair’s durability. Monitor the fitting for any signs of leakage or deterioration. Proper testing and monitoring are essential to verify the repair’s effectiveness and prevent future leaks.
How to Seal Leaking PVC Fittings
Sealing a leaking PVC fitting requires careful attention to the specific type of leak and the PVC material. PVC fittings, while durable, can develop leaks due to temperature changes, physical stress, or improper installation.
Here’s a step-by-step guide to effectively seal a leaking PVC fitting:
Step 1. Identify the Leak Source and PVC Fitting Type
Begin by accurately pinpointing the leak’s origin. Thoroughly inspect the fitting and surrounding pipes to determine where the leak is occurring. Pay close attention to joints, seams, and any areas where the PVC may be stressed or damaged. Identify the type of PVC fitting (e.g., threaded, solvent-welded, compression) to select the appropriate repair method.
Determine the severity of the leak. Minor leaks may be addressed with sealants, while major leaks or damaged fittings may necessitate replacement. Assess the overall condition of the PVC fitting and surrounding pipes. Look for cracks, splits, or any signs of degradation. This assessment is critical for determining the best course of action and preventing future leaks.
Step 2. Prepare the Fitting and Surrounding Area
Before attempting any repairs, thoroughly clean the PVC fitting and surrounding pipes. Remove any dirt, debris, or old sealant that could interfere with the new seal. Use a clean cloth or brush to ensure the surfaces are free from contaminants. If necessary, lightly sand the surfaces to create a better bonding surface for sealants or adhesives.
For threaded PVC fittings, disassemble the fitting if possible and remove any old thread sealant or Teflon tape. Ensure the threads are clean and undamaged. For solvent-welded fittings, clean the joint area thoroughly and remove any loose PVC material. For compression fittings, inspect the components for damage or wear. Proper preparation ensures a strong and lasting seal.
Step 3. Apply the Appropriate Sealing Method
For minor leaks in threaded PVC fittings, apply fresh Teflon tape or thread sealant to the male threads. Wrap Teflon tape clockwise, ensuring it covers all threads. Apply thread sealant evenly, following the manufacturer’s instructions. For solvent-welded fittings, use a PVC primer and cement to create a chemical bond between the fitting and pipe. Follow the manufacturer’s instructions for application and curing time.
For leaks in compression fittings, tighten the nut using a wrench. Ensure the fitting is properly aligned and tighten the nut evenly to avoid distortion. If tightening does not resolve the leak, disassemble the fitting and inspect the compression ring for damage. Replace the compression ring if necessary. For cracks or splits in the PVC fitting body, use a PVC repair epoxy or a pipe repair clamp. Follow the manufacturer’s instructions for application and curing time.
Step 4. Test the Repaired Fitting
After applying the sealing method, test the repaired PVC fitting to ensure the leak is resolved. Reassemble the system and pressurize it to the operating pressure. Carefully inspect the fitting and surrounding area for any signs of leaks. Use a dry cloth to check for moisture or fluid seepage. If a leak persists, re-evaluate the repair and consider alternative sealing methods or fitting replacement.
If the fitting holds pressure without leaks, run the system under normal operating conditions for a period of time to ensure the repair’s durability. Monitor the fitting for any signs of leakage or deterioration. Proper testing and monitoring are essential to verify the repair’s effectiveness and prevent future leaks.
What is the Purpose of a Sealing Fitting
The primary purpose of a sealing fitting is to prevent the passage of fluids, gases, or other substances through a connection point in a piping or tubing system. They are designed to create a leak-proof barrier, ensuring the integrity and efficiency of the system. Sealing fittings are crucial in applications where even small leaks can lead to significant problems, such as in hydraulic, pneumatic, and chemical processing systems. They help maintain pressure, prevent contamination, and ensure safety.
Sealing fittings achieve this by incorporating various sealing mechanisms, such as O-rings, gaskets, or tapered threads, which create a tight, impermeable connection. They are available in a wide range of materials and designs to suit different applications, pressures, and temperatures. Proper selection and installation of sealing fittings are essential to prevent leaks and maintain the system’s performance.
Prevent fluid or gas passage:
- Creates an impermeable barrier at connection points.
- Maintains system pressure and prevents loss of conveyed substances.
Ensure system integrity:
- Prevents contamination by keeping external substances out.
- Maintains the purity of conveyed fluids or gases.
Enhance safety:
- Prevents leaks of hazardous or flammable materials.
- Reduces the risk of accidents and environmental damage.
Maintain system efficiency:
- Reduces pressure drops and flow losses.
- Ensures optimal performance of hydraulic and pneumatic systems.
Conclusion
In conclusion, sealing a leaky pipe fitting requires careful diagnosis and the right materials. Whether using thread sealants, pipe dope, or compression fittings, proper application is crucial. Identifying the leak’s source and understanding the fitting type ensures a lasting repair. Regular maintenance and inspections can prevent future leaks, safeguarding system integrity.
Effective sealing techniques minimize fluid loss and prevent costly damage. Thread sealants and pipe dope offer temporary fixes, while compression fittings provide a more permanent solution. Proper tightening and material selection are essential for a reliable seal. Addressing leaks promptly maintains system pressure and efficiency.
For high-quality wholesale hydraulic fittings and sealing solutions, contact DF Hydraulics today. We offer a comprehensive range of fittings and sealants tailored to your industrial needs. Partner with us for reliable and efficient fluid transfer systems. Get in touch to discuss your requirements and benefit from our expert services.


