When it comes to connecting pipes in plumbing or irrigation systems, compression fittings are a reliable and efficient solution. But how to install compression fittings properly? The installation process may vary slightly depending on the type of pipe you’re working with—whether it’s plastic, copper, PVC, or others. In this article, we will guide you through the installation of compression fittings on different types of pipes. If you have any questions or need more help, feel free to contact us at any time!
What is a Compression Fitting?
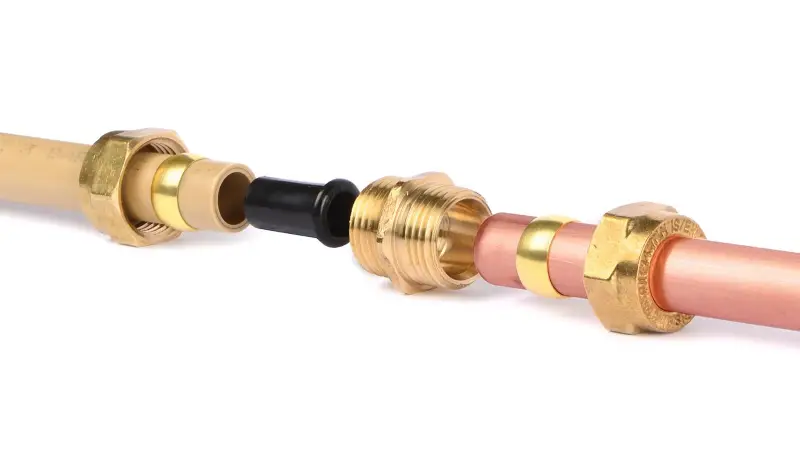
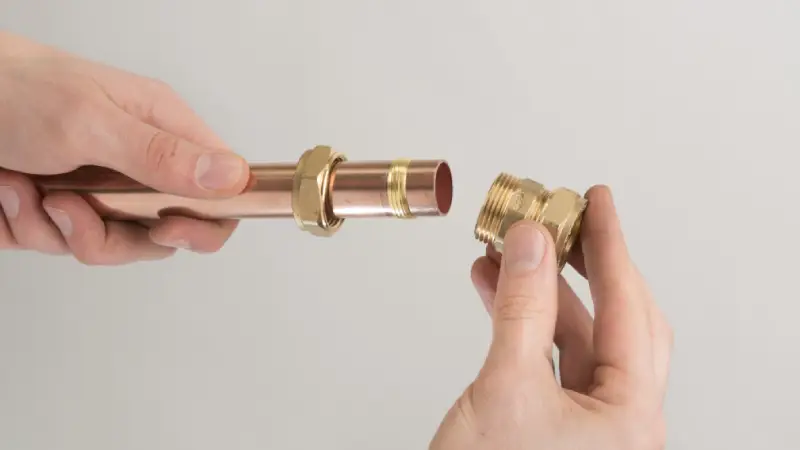
Compression fittings are used to join two pipes securely by compressing a ring (called a ferrule) around the pipe’s surface when tightened. These fittings are commonly used in plumbing and irrigation systems due to their easy installation and strong, leak-proof connections.
Components of a Compression Fitting:
- Compression Nut: Tightens the fitting around the pipe.
- Compression Ring (Ferrule): Squeezes onto the pipe to create a tight seal.
- Fitting Body: The actual component that houses the compression nut and ferrule.
Common Applications:
Compression fittings are often used in water lines, gas lines, and HVAC systems. They are ideal for both residential and industrial use, especially in areas where pipes may need to be disassembled or adjusted later.
Types of Compression Fittings:
| Type | Material | Usage | Pipe Compatibility |
|---|---|---|---|
| Brass Compression Fitting | Brass | Plumbing, irrigation systems | Copper, plastic, steel pipes |
| Plastic Compression Fitting | Plastic (PVC, CPVC) | Low-pressure applications | Plastic pipes |
| Stainless Steel Compression Fitting | Stainless Steel | High-pressure applications, industrial use | Copper, steel pipes |
General Installation Process for Compression Fittings
Material and Tool Preparation
Before starting any installation, it’s important to gather all necessary materials and tools to ensure the job goes smoothly.
Materials Needed:
- Compression fitting (choose the correct type and size for the pipe material and application)
- Compression ring (ferrule) (usually comes with the fitting)
- Pipe (plastic, copper, PVC, etc.) (ensure the pipe is cut to the correct length)
Tools Required:
- Pipe Cutter: A clean, precise cut is essential for a good seal. For plastic pipes, a pipe cutter ensures a straight, smooth edge. For copper and metal pipes, a tubing cutter or hacksaw can be used.
- Deburring Tool: After cutting the pipe, it’s crucial to remove any burrs or sharp edges, as these can affect the fitting’s seal and lead to leaks.
- Adjustable Wrench or Spanner: Used for tightening the compression nut onto the fitting. It’s important to use the correct amount of torque—not too tight to avoid damaging the pipe, but firm enough to create a strong, leak-proof seal.
- Pipe Cleaning Cloth: To ensure that the pipe surface is free from dirt, dust, or oil which could interfere with the seal.

Preparation Before Install Compression Fittings
A. Measure and Cut the Pipe Correctly Accurate measurement is key to a successful installation. Here’s how to measure and cut your pipe:
- Use a measuring tape to mark the desired length of the pipe.
- Step 1: Position your pipe cutter on the marked section and ensure the pipe is level.
- Step 2: Cut the pipe using the pipe cutter, ensuring that the cut is straight and clean. If you’re using a hacksaw, ensure the cut is as straight as possible and that you remove any excess material.
For plastic tubing, especially, avoid cracks or uneven edges when cutting. A clean cut is essential for the compression fitting to function properly.
B. Clean the Pipe Before Installation Proper cleaning of the pipe ensures a tight seal and prevents contaminants from affecting the connection. After cutting the pipe, remove any sawdust, burrs, or debris:
- For plastic pipes, clean the outer surface thoroughly with a cloth.
- For metal pipes (such as copper), use a wire brush or sandpaper to remove any oxidation or burrs on the cut pipe end.
- Step 1: Use a deburring tool to smooth the inside and outside of the pipe cut. This will help the fitting slide in smoothly and prevent any potential leaks.
How to Install Compression Fittings: Detailed Installation Steps
Now, let’s walk through the step-by-step process to install the compression fitting:
Step 1: Slide the Compression Nut and Ring onto the Pipe
- Step 1.1: Start by placing the compression nut onto the pipe. The larger end of the nut should face outward.
- Step 1.2: Slide the compression ring (ferrule) onto the pipe next, ensuring it sits flush against the pipe’s edge. The ring must fit snugly to prevent leaks.
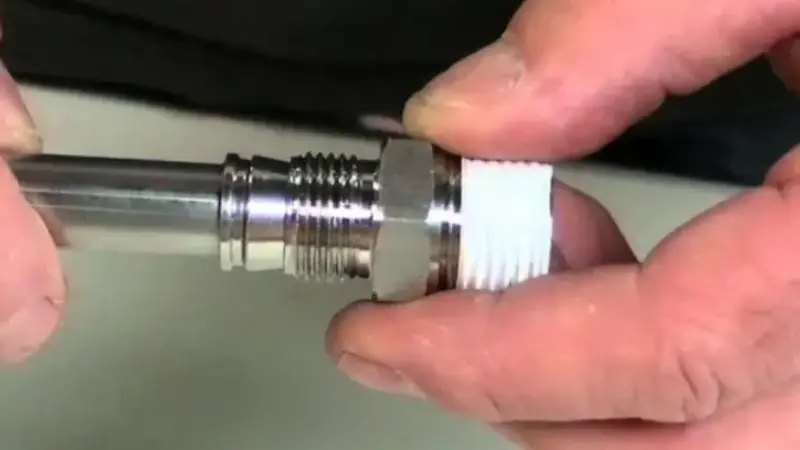
Step 2: Insert the Pipe into the Compression Fitting Body
- Step 2.1: Insert the pipe into the compression fitting body. The pipe should be pushed all the way into the fitting so that it touches the inner shoulder of the fitting.
- Step 2.2: Ensure that the pipe is fully seated into the fitting. If it’s a larger pipe, gently twist the pipe as you insert it to ensure smooth insertion without damage.
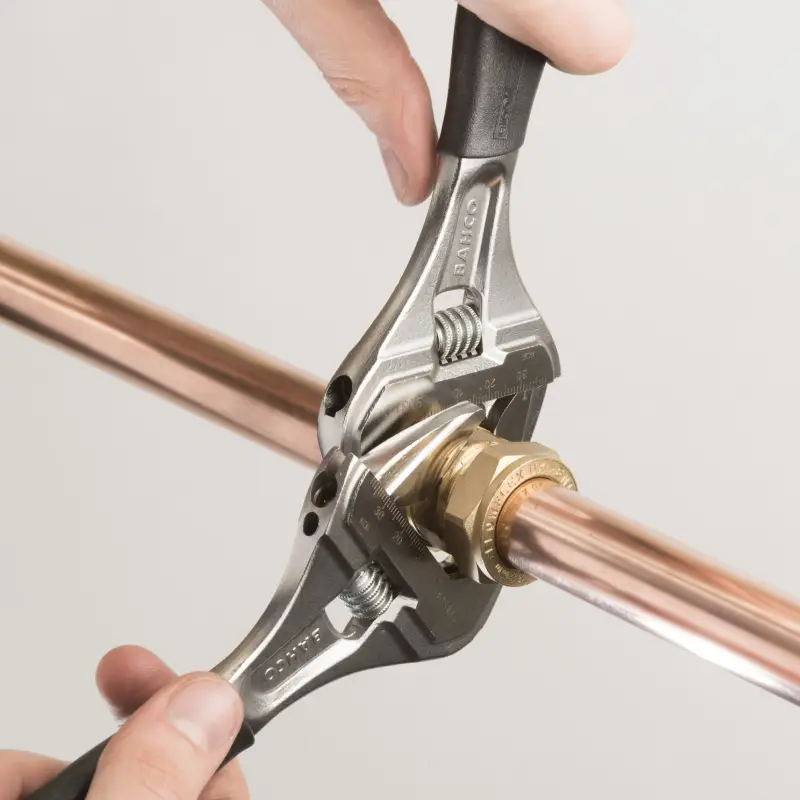
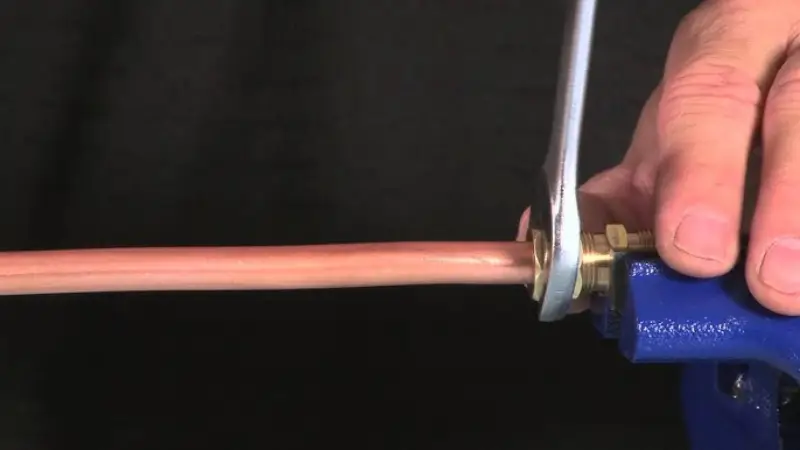
Step 3: Tighten the Compression Nut
- Step 3.1: Hand-tighten the compression nut onto the fitting body. Make sure the nut is aligned properly and is positioned straight onto the threads of the fitting body.
- Step 3.2: Once it’s hand-tightened, use an adjustable wrench to tighten the nut further. Tip: Do not over-tighten. Compression fittings rely on the compression of the ferrule (the ring) to create a seal. Over-tightening can damage the pipe or fitting.
- Step 3.3: Tighten the nut until the ferrule compresses firmly against the pipe. If you feel resistance, stop tightening. You’ve reached the ideal torque when the nut is snug but not over-tightened.
Step 4: Final Check Installation Compression Fittings
- Step 4.1: Once everything is tightened, perform a quick check to ensure the pipe is secure. Give the pipe a gentle tug to confirm that it’s held firmly in place.
- Step 4.2: Check for any gaps between the compression nut and the fitting body. If there’s a gap, the nut needs to be tightened slightly more.
Inspection After Installing Compression Fittings
After the compression fitting is installed, it’s essential to perform a series of checks to ensure everything is properly sealed and there are no leaks.
A. Check for Leaks
- Step 1: Slowly turn on the water supply or system that the pipe is connected to. If it’s a gas line, carefully check for any leaks using a soapy water solution around the compression fitting.
- Step 2: Look for bubbles or moisture around the fitting area. Any sign of leaking means the fitting was either not tightened properly or the pipe wasn’t properly aligned.
- Step 3: If you find a leak, Step 4: Use the adjustable wrench to tighten the compression nut slightly. Be cautious not to overtighten, as this can damage the fitting.
B. Confirm the Tightness of All Connections
- Step 1: Double-check all connected compression fittings to ensure they’re snug and securely installed. A loose connection can lead to leaks over time.
- Step 2: Test the system again after tightening to confirm that all connections are properly sealed.
Maintenance and Troubleshooting After Installing Compression Fittings
Compression fittings don’t require constant maintenance, but like all plumbing, occasional checks are necessary. Here’s how to keep your system running smoothly:
A. Maintenance Tips
- Periodically inspect the compression fittings for any signs of leakage or wear, especially if the system is exposed to high pressure or frequent use.
- If the system is under frequent vibration (like in irrigation or HVAC systems), it’s a good idea to check the fittings more often to ensure they remain tightly sealed.
B. Troubleshooting Common Issues
- Leakage at the Compression Fitting:
- Cause: This usually happens due to an improperly tightened compression nut, a damaged ferrule, or debris between the pipe and fitting.
- Solution: Turn off the water or gas supply, remove the compression fitting, clean the pipe and fitting, and reassemble. Tighten the compression nut to the correct torque.
- Difficulty Tightening the Compression Nut:
- Cause: A misaligned pipe or threads may be preventing the nut from tightening correctly.
- Solution: Ensure the pipe is properly aligned with the fitting body. If the fitting is corroded, replace it.
Installation Tips for Specific Pipe Types
How to Install Compression Fitting on Plastic Tubing
- Step 1: For plastic tubing, it’s especially important to make sure that the pipe is not deformed during installation, as plastic can be more vulnerable to cracking. Use a pipe cutter for a clean, straight cut.
- Step 2: Avoid overtightening the compression nut. Excessive pressure can crush the plastic pipe and create a weak spot that might eventually leak.
- Step 3: After tightening the compression nut, check for leaks. Since plastic is more flexible, it may require slight adjustments to achieve a perfect seal.
How to Install Copper Pipe Compression Fittings:
- Step 1: Use a pipe cutter to get a clean, square cut. Copper is a soft metal, and it’s crucial to ensure no rough edges are left.
- Step 2: Clean the pipe ends to remove any debris or oxidation. Copper can develop a layer of oxidized copper (greenish tarnish), which must be cleaned off.
- Step 3: Tighten the compression nut snugly but avoid over-tightening, as copper can easily be damaged by excessive pressure.
How to Install Compression Fittings on PVC Pipe:
PVC is relatively easy to work with, but it’s crucial to ensure that the compression nut is tightened enough to compress the ferrule without cracking the pipe.
- Step 1: Use a PVC pipe cutter to achieve a straight and clean cut. If the pipe is irregular, it could result in poor compression fitting performance.
- Step 2: Use PVC primer and solvent cement for added security in some applications, particularly for permanent installations.
How to Install Compression Fittings: Key Installation Points & Considerations
When installing compression fittings, several critical points must be kept in mind to ensure a proper and secure connection. These considerations not only help prevent common issues such as leaks but also contribute to a long-lasting and reliable installation.
Below are the essential takeaways and key points to remember during the installation process:
Ensure Correct Pipe Measurement and Cutting
- Straight and Clean Cuts: Ensure that the pipe is cut cleanly and evenly. A crooked or jagged cut will prevent the compression fitting from sealing properly, which may lead to leaks.
- Proper Pipe Length: Measure twice and cut once. Overly long or short pipes can make it difficult to connect the compression fitting securely and might result in an unstable connection.
Correct Pipe Alignment
- Pipe Seating: When inserting the pipe into the fitting, ensure it is fully pushed into the fitting until it touches the internal shoulder. An improperly seated pipe can lead to an incomplete seal, which increases the risk of leaks.
- Avoiding Twists: Do not twist or bend the pipe when inserting it into the fitting. Twisting can misalign the pipe, causing uneven pressure on the compression ring and resulting in a poor seal.
Use the Right Tools
- Deburring Tool: Always use a deburring tool after cutting the pipe to remove sharp edges and burrs. This helps avoid damage to the compression fitting, ensures a tighter seal, and prevents the risk of leaks.
- Wrench Torque: Use an adjustable wrench to tighten the compression nut. It is essential to tighten the nut properly, but do not over-tighten. Over-tightening can crush the ferrule (compression ring) or damage the pipe, which may cause leaks. A snug fit is typically sufficient.
Do Not Over-Tighten the Compression Nut
- Snug But Not Too Tight: The compression fitting relies on the ferrule to create a seal. Over-tightening the compression nut may crush or distort the ferrule, leading to damage. Tighten the nut until it is snug and provides a solid seal without excessive force.
- Use Finger Tightness as a Guide: Initially tighten the compression nut by hand, then use the wrench for a final tightening. Typically, one or two turns with the wrench after hand-tightening is sufficient.
Avoid Pipe Distortion or Cracking
- Plastic Pipes: Be careful not to distort plastic pipes during installation. They are more prone to cracking under excessive pressure. Use a pipe cutter instead of a hacksaw to prevent damaging the pipe and ensure a clean, straight cut.
- Copper Pipes: Copper is relatively soft, so avoid excessive force when tightening the compression nut. Be mindful of the pipe’s condition—oxidized or dirty copper should be cleaned before installation to ensure a tight and reliable seal.
Check for Leaks After Installation
- Perform a Pressure Test: After installation, it’s critical to perform a pressure test or run water through the system to check for any leaks. Even a small leak can cause long-term damage or failure, so thorough inspection is crucial.
- Bubble Test for Gas Lines: If you’re working with gas lines, use a soapy water solution around the compression fittings to check for leaks. The presence of bubbles will indicate a leak that needs to be addressed.
Use of Compression Fittings with Different Pipe Materials
- Plastic Tubing: When working with plastic pipes, always use the appropriate compression fitting designed for plastic. Ensure that the pipe is properly sized and that the ferrule compresses without damaging the pipe.
- Copper and Metal Tubing: Metal pipes, including copper, should be cleaned of oxidation before installing the fitting. Use a wire brush or emery cloth to remove tarnish or corrosion to avoid creating a weak spot at the connection point.
Consider the Application and Pressure Rating
- High Pressure: For high-pressure applications, ensure that the compression fitting is rated for the pressure. Some fittings may not perform well under excessive pressure, leading to potential failures.
- Specialized Fittings for Unique Applications: In applications such as refrigeration lines or irrigation systems, use compression fittings that are specifically designed for those uses. These fittings are built to withstand environmental conditions such as temperature variations or exposure to chemicals.
Be Cautious of Different Fitting Types
- Brass vs. Stainless Steel Fittings: While both materials are commonly used for compression fittings, brass fittings tend to be more durable and are generally easier to tighten. However, stainless steel fittings may be required for higher-corrosion environments. Always choose the right material based on the environment and intended use.
- Compression Rings (Ferrules): Always ensure the ferrule is placed correctly and is not damaged. A deformed or worn ferrule will not form a proper seal, resulting in leaks.
Maintain Proper Support for Piping
- Pipe Support: Ensure that the pipe is properly supported on both ends to avoid strain at the compression fitting. Unsupported pipes can lead to bending or movement, which can loosen the compression fitting over time.
Conclusion
Installing compression fittings is a simple and effective way to connect pipes securely. By following these steps, you can ensure a leak-free and durable connection for water lines, gas lines, or irrigation systems.
If you have any questions or need assistance with your installation, feel free to reach out. If you’re interested in our products, visit our homepage or ask for our product catalog.
FAQs
Do you need to use sealant on compression fittings?
No, compression fittings rely on the mechanical compression of the ferrule to create a seal, not a sealant. Using sealant can interfere with the fitting’s ability to create a tight seal and could lead to leaks.
Do compression fittings need to be flared?
No, compression fittings do not require flaring. Unlike flare fittings, compression fittings use a compression ring to form a seal, so there’s no need to flare the pipe ends.
How tight should compression fittings be?
Compression fittings should be tightened firmly but not over-tightened. Excessive force can damage the pipe or fitting. Tighten until the fitting is snug, and the ferrule has been properly compressed.
Can I install a compression fitting on any pipe?
Yes, compression fittings can be used on copper, plastic, PVC, and stainless-steel pipes. However, make sure to use the appropriate fitting for each material.
How can I ensure my compression fitting is leak-proof?
To ensure a leak-proof installation, use clean, deburred pipe ends, align the pipe properly with the fitting, and avoid overtightening.
Where to buy fittings?
For the best quality compression fittings, contact us for custom fittings that suit all your needs. We at Dingfeng offer a full range of compression fittings for various pipe types. Feel free to contact us anytime for orders or product catalogs!


