Compression fittings are essential components in plumbing systems and various industrial applications, but they are not immune to issues, especially leaks.
In this article, we will explore the most common cause of leaking compression fittings, the steps to fix and prevent them, and offer practical tips from personal experience. If you have any questions about this article, feel free to contact us at any time.
What Are Compression Fittings?
Definition of Compression Fittings
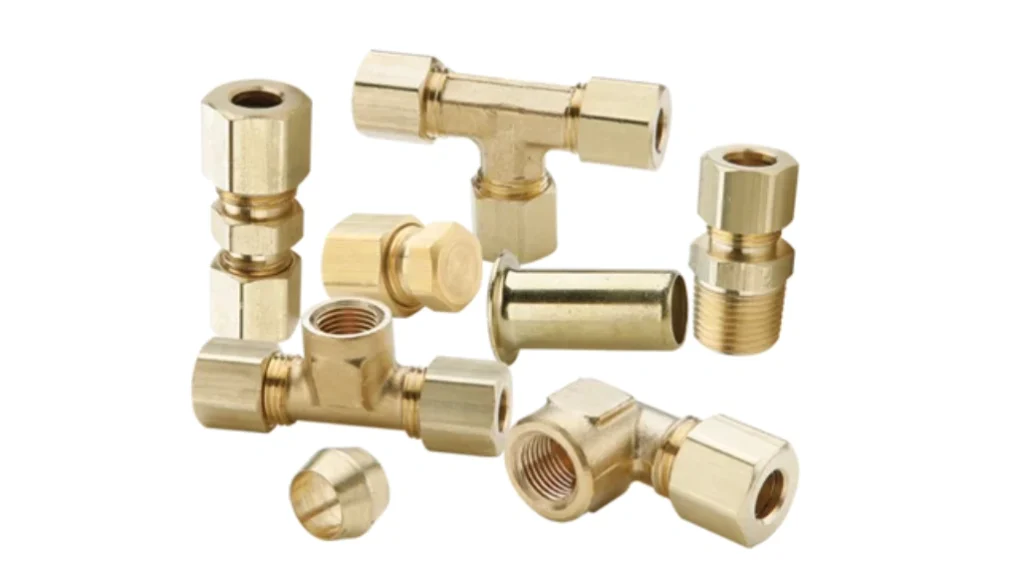
A compression fitting is a type of connector used to join two pipes or a pipe to a fixture, ensuring a secure and leak-proof seal. These fittings rely on compression to seal the connection, making them a versatile and widely-used solution in plumbing and other applications.
Sizes and Types of Compression Fittings
Compression fittings come in various sizes, typically ranging from 1/8 inch to 2 inches in diameter. Common materials include brass, stainless steel, and plastic, catering to different systems such as water, gas, or oil.
| Nominal Size | Tube OD (mm) | Typical Applications |
|---|---|---|
| 1/8″ | 4 | Small instrumentation lines |
| 1/4″ | 6.35 | General plumbing and HVAC systems |
| 1/2″ | 12.7 | Residential water supply, gas lines |
| 3/4″ | 19.05 | Larger plumbing systems, industrial processes |
| 1″ | 25.4 | Heavy-duty applications |
Common Causes of Leaking Compression Fittings and Solutions
Cause 1: Incorrect Tightening
The most common cause of leaking compression fittings is improper tightening, either under-tightening or over-tightening. Under-tightening leads to loose seals, while over-tightening can damage the fitting or compress the ferrule unevenly.
Solution:
- Loosen the Fitting Gently: Carefully loosen the compression nut without fully removing it to avoid damaging the threads.
- Hand-Tighten the Nut: Hand-tighten the nut until snug, then use a wrench to make an additional quarter to half-turn. Avoid over-tightening by following the manufacturer’s torque specifications.
- Test for Leaks: Turn on the system and observe the joint for any signs of leakage. If leaks persist, slightly loosen the nut, reposition the ferrule if necessary, and retighten carefully.
Cause 2: Misaligned Pipes
Pipes that are not perfectly aligned can cause the ferrule to seat incorrectly, leading to leaks.
Solution:
- Disconnect and Inspect: Disconnect the fitting and inspect the pipe alignment. Ensure both ends are straight and properly inserted into the fitting body.
- Realign the Pipes: Realign the pipes to ensure a straight connection. Use clamps or supports if necessary to maintain alignment during installation.
- Reinstall and Verify: Reinstall the fitting, ensuring the ferrule seats correctly. Test the connection for leaks by running water or gas through the system.
Cause 3: Damaged Components
Worn or damaged ferrules, nuts, or threads can compromise the fitting’s integrity.
Solution:
- Inspect Components: Thoroughly inspect all components for wear, corrosion, or damage. Look for signs of dents, cracks, or worn threads.
- Replace Damaged Parts: Replace any damaged parts with compatible replacements. Ensure new components are from a reputable manufacturer to guarantee quality.
- Reassemble and Test: Reassemble the fitting and test for leaks. Properly cleaned and undamaged components will help ensure a reliable seal.
Cause 4: Improper Ferrule Installation
The ferrule must seat correctly against the pipe and fitting to create a proper seal. Incorrect installation can result in leaks.
Solution:
- Remove and Inspect: Remove the fitting and inspect the ferrule for proper seating. Ensure it is not damaged or deformed.
- Correct Positioning: Ensure the ferrule is positioned correctly on the pipe. The tapered side should face the fitting body to allow for proper compression.
- Reassemble and Tighten Correctly: Reassemble the fitting, making sure the ferrule is seated properly before tightening the nut according to the manufacturer’s guidelines.
Cause 5: Poor Pipe Preparation
Inadequate preparation of the pipe or tubing can lead to poor sealing. Rough edges or burrs can interfere with the ferrule’s ability to form a tight seal.
Solution:
- Deburr the Ends: After cutting the pipe or tubing, deburr the ends using a deburring tool or fine sandpaper to remove any rough edges or burrs.
- Check for Smoothness: Ensure the cut is smooth and square. A poorly cut end can prevent the ferrule from seating correctly.
- Verify Insertion Depth: Confirm that the pipe is fully inserted into the fitting body to the stop to avoid misalignment.
Cause 6: Material Incompatibility
Using materials that are incompatible with the fluid or gas being transported can lead to corrosion or degradation over time, resulting in leaks.
Solution:
- Select Compatible Materials: Choose fittings made from materials that are compatible with the specific fluids or gases used in your application. Consult material compatibility charts provided by manufacturers.
- Consider Environmental Factors: Take into account environmental conditions such as temperature, pressure, and exposure to chemicals when selecting materials.
- Regular Inspection: Regularly inspect the fittings for signs of corrosion or wear, especially in harsh environments.
Cause 7: Contamination
Contaminants like dirt, debris, or old sealant can interfere with the proper seating of the ferrule and lead to leaks.
Solution:
- Clean All Components: Before assembly, clean all components thoroughly to remove any contaminants. Use a suitable cleaning agent and dry the parts completely.
- Avoid Overuse of Lubricants: If lubricants are required, use only those recommended by the manufacturer. Excessive lubrication can attract dirt and debris.
- Inspect for Cleanliness: Ensure all surfaces are clean and free from contaminants before final assembly.
By addressing these common causes and implementing the suggested solutions, you can significantly reduce the likelihood of leaks in compression fittings, ensuring reliable and efficient performance in various plumbing and industrial applications.
How to Prevent Compression Fitting Leaks
Preventing leaks in compression fittings is crucial for maintaining the integrity and efficiency of fluid systems. Below are extended steps that can help ensure your compression fittings remain leak-free over time:
Step 1: Use Quality Components
Invest in High-Quality Materials:
- Durability: Opt for compression fittings made from durable materials like brass, stainless steel, or high-quality plastics. These materials resist corrosion and wear, ensuring long-term reliability.
- Reputation: Choose fittings from reputable manufacturers known for quality control and performance. Reliable brands often provide better warranties and customer support.
- Compatibility: Ensure that all components (pipes, tubes, nuts, ferrules) are compatible with each other and the system’s operating conditions. Material compatibility charts can guide you in selecting the right materials.
Benefits:
- Reduces the risk of premature failure due to material degradation.
- Ensures a reliable seal even under varying pressure and temperature conditions.
Step 2: what does proper tightening of a compression fitting require
Follow Manufacturer Instructions:
- Detailed Guidelines: Always consult the manufacturer’s installation instructions for specific guidance on assembly and tightening procedures.
- Tools and Equipment: Use appropriate tools such as torque wrenches, pipe cutters, and deburring tools to achieve precise and professional results.
Hand-Tightening and Final Tightening:
- Initial Hand-Tightening: Begin by hand-tightening the nut until snug. This initial step helps align the components properly.
- Final Tightening: Use a wrench to make an additional quarter to half turn beyond hand-tightness. Avoid over-tightening, which can deform the ferrule and compromise the seal.
Proper Assembly:
- Component Alignment: Ensure all parts are aligned correctly, especially the ferrule, to prevent misalignment that could lead to improper seating.
- Smooth Pipe Ends: Prepare the pipe ends by cutting them squarely and deburring any rough edges. A clean, smooth end allows the ferrule to seat properly.
Step 3: Regular Inspections
Periodic Checks:
- Frequency: Schedule regular inspections, especially in critical applications where leaks can have severe consequences.
- Visual Inspection: Look for signs of wear, corrosion, or damage on the fitting, ferrule, and threads. Pay attention to any discoloration or deformation that might indicate issues.
Testing for Leaks:
- Pressure Testing: After installation, test the system by running water or gas through it and checking for leaks. Repeat this periodically to catch potential issues early.
- Maintenance Logs: Keep detailed records of inspections and maintenance activities to track the condition of fittings over time.
Step 4: Lubrication
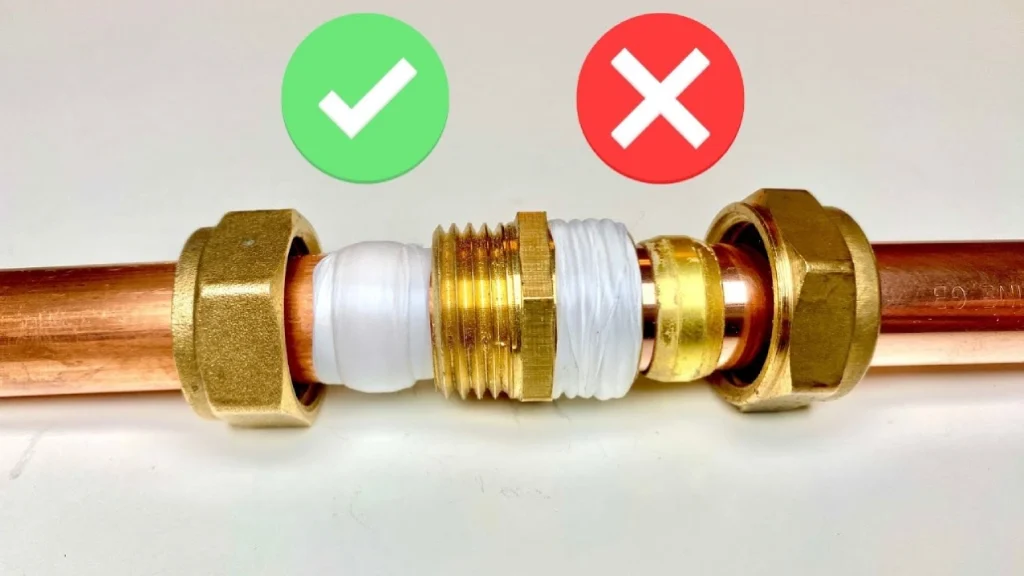
Use Appropriate Sealants:
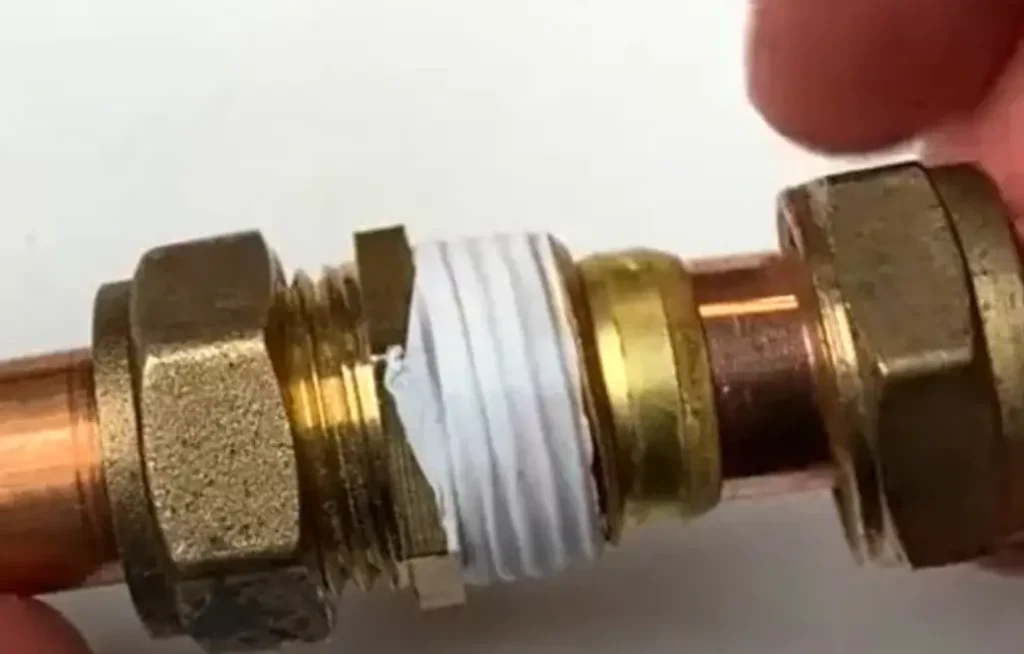
- Pipe Thread Sealant or Teflon Tape: If recommended by the manufacturer, apply a thin layer of pipe thread sealant or wrap Teflon tape around the threads. This can enhance the seal and prevent leaks.
- Lubricant Compatibility: Ensure that any lubricant used is compatible with the materials and fluids in the system. Incompatible lubricants can degrade seals or contaminate the fluid.
Avoid Overuse:
- Minimal Application: Apply only the amount of lubricant necessary to aid assembly. Excessive lubrication can attract dirt and debris, leading to contamination and poor sealing.
Step 5: Avoid Over-Tightening
Torque Specifications:
- Torque Wrenches: Use torque wrenches where applicable to ensure fittings are tightened to the correct specifications. This prevents both over-tightening and under-tightening.
- Manufacturer Recommendations: Follow the manufacturer’s torque recommendations closely. Different fittings may require different torque levels based on size and material.
Adjustment and Retesting:
- Gradual Tightening: Tighten gradually and check for leaks after each adjustment. This approach allows you to find the optimal tightness without risking damage.
- Retest After Adjustment: After making any adjustments, retest the connection to ensure the leak has been resolved and no new issues have arisen.
Additional Preventive Measures
Environmental Considerations:
- Protect from External Factors: Shield compression fittings from environmental factors like extreme temperatures, UV exposure, and chemical spills that can degrade materials over time.
- Cathodic Protection: For metal fittings in corrosive environments, consider cathodic protection methods to extend their lifespan.
Training and Education:
- Employee Training: Provide training for personnel involved in installing and maintaining compression fittings. Educated staff can identify potential issues early and apply best practices consistently.
- Stay Updated: Stay informed about new technologies and best practices in compression fitting installation and maintenance. Manufacturers often release updated guidelines and innovative products that can improve performance.
By implementing these comprehensive preventive measures, you can significantly reduce the likelihood of leaks in compression fittings, ensuring reliable and efficient operation across various applications.
How to Fix a Leaking Compression Fitting
Step 1: Identify and Stop the Water Supply
- Locate the Shut-Off Valve: Determine the shut-off valve controlling the water supply to the leaking fitting. This could be a main water valve, a valve specific to the fixture (sink, toilet), or a valve on the supply line itself.
- Turn Off the Water Supply: Carefully turn the shut-off valve clockwise to completely stop the water flow.
- Release Pressure: Open a faucet downstream from the fitting to release any remaining water pressure in the line.
Step 2: Access and Inspect the Fitting
- Gain Access: Remove any obstructions (cabinets, panels) that may hinder access to the leaking fitting.
- Inspect for Damage: Carefully examine the fitting for signs of damage, such as cracks, corrosion, or a deformed nut.
- Check for Loose Connections: Ensure the fitting is securely tightened. If the nut is loose, try gently tightening it with an appropriate wrench.
Step 3: Attempt to Tighten the Compression Fitting (If Applicable)
- Use the Correct Tools: Use adjustable wrenches or pipe wrenches of the appropriate size to grip the fitting body and the nut.
- Tighten Gradually: Tighten the nut in small increments, avoiding excessive force. Overtightening can damage the fitting or the pipe.
- Check for Leaks: After tightening, turn the water supply back on and carefully inspect the fitting for any signs of leaks.
Step 4: Replace the Compression Fitting (If Necessary)
If tightening doesn’t resolve the leak:
Turn off the water supply as described in Step 1.
Loosen and remove the nut: Use appropriate wrenches to loosen and remove the nut from the fitting.
Remove the old fitting: Carefully remove the old fitting from the pipe.
Clean the pipe end: Ensure the pipe end is clean and free of debris.
Install the new compression fitting:
- Insert the pipe into the new fitting.
- Install the ferrule (olive) onto the pipe.
- Hand-tighten the nut onto the fitting.
- Use wrenches to tighten the nut securely, but avoid overtightening.
- Turn on the water supply and check for leaks.
Important Notes:
- If you are unsure about any of these steps, it is best to consult with a qualified plumber.
- Always wear appropriate safety gear, such as safety glasses, when working with plumbing.
- If the leak is severe or persistent, it is crucial to address the issue promptly to prevent further damage to your property.
By following these steps, you may be able to successfully fix a leaking compression fitting. However, if you are not comfortable performing these repairs yourself, it is always best to contact a qualified plumber for assistance.
How to Seal a Leaking Compression Fitting
Sealing a leaking compression fitting requires a systematic approach, focusing on the mechanical nature of the seal. Here’s a detailed guide on how to effectively address and repair a leak in a compression fitting:
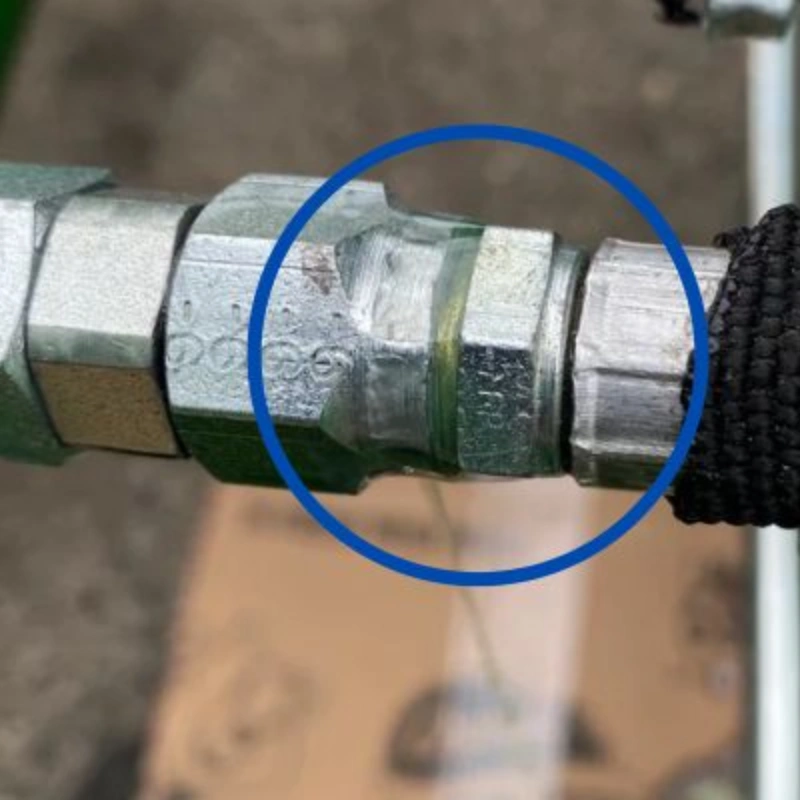
Step 1. Identify the Leak Source and Assess the Fitting Condition
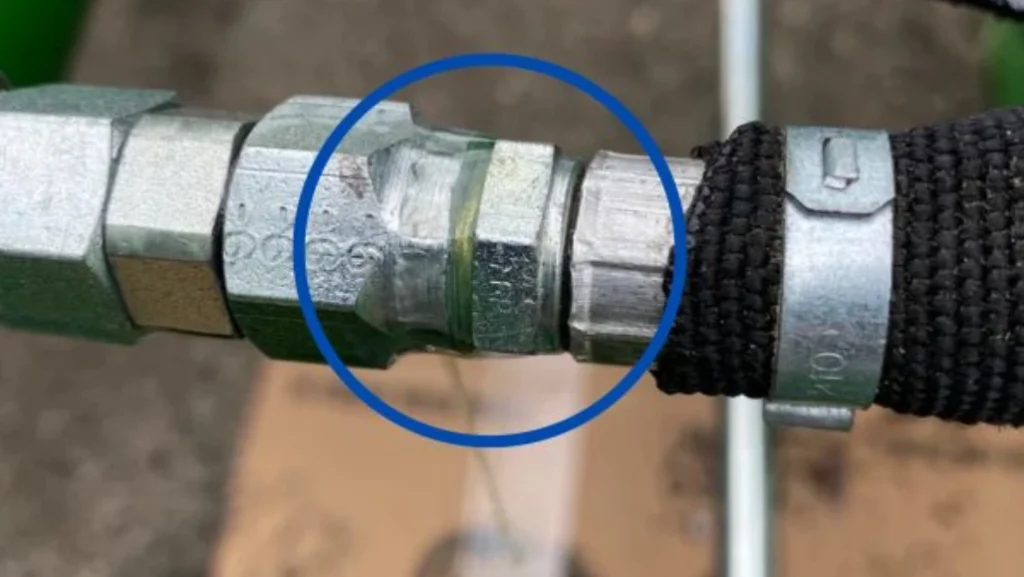
Begin by precisely locating the source of the leak within the compression fitting. This involves a thorough visual inspection of the nut, the compression ring (ferrule), and the pipe itself. Determine if the leak is originating from the connection point between the nut and fitting body, where the pipe enters the fitting, or along the pipe within the compression zone. Understanding the leak’s origin is crucial for selecting the appropriate repair strategy.
Next, assess the overall condition of the compression fitting. Check for any visible damage, such as cracks, corrosion, or deformation in the nut or fitting body. Inspect the compression ring (ferrule) for signs of damage, improper seating, or distortion. Ensure the pipe is properly inserted into the fitting and that there are no visible signs of damage or deformation within the compression zone. A detailed assessment will help you determine whether tightening, component replacement, or pipe repair is necessary.
Step 2. Prepare the Fitting and Pipe for Repair
Before attempting any repairs, thoroughly clean the compression fitting and the pipe. Remove any dirt, debris, or old sealant that might interfere with the new seal. Use a clean cloth or brush to ensure all surfaces are free from contaminants. If necessary, lightly sand the pipe’s surface to provide a better grip for the compression ring. Disassemble the fitting if required for cleaning or inspection.
Inspect the pipe for any damage or scratches within the compression zone. Ensure the pipe is cut squarely and free from burrs or sharp edges. If the pipe is damaged, cut it back to a clean, undamaged section. Check the compression ring (ferrule) for proper orientation and ensure it is not damaged or distorted. Proper preparation of the fitting and pipe is essential for achieving a reliable and leak-free seal.
Step 3. Apply the Appropriate Sealing Method
For leaks occurring at the nut, attempt to tighten the nut using a wrench. Ensure the fitting is properly aligned and tighten the nut evenly to avoid distortion or damage. If tightening does not resolve the leak, disassemble the fitting and inspect the compression ring (ferrule) for damage or improper seating. Replace the compression ring if necessary. Apply a small amount of thread sealant to the threads of the nut before reassembling the fitting to enhance the seal.
For leaks occurring along the pipe within the fitting’s compression zone, disassemble the fitting and inspect the pipe and compression ring (ferrule) for damage. If the pipe is damaged, cut it back to a clean, undamaged section. Replace the compression ring if necessary. Ensure the pipe is properly inserted into the fitting and the compression ring is correctly positioned before tightening the nut. Proper application of the sealing method, whether tightening, component replacement, or pipe repair, is crucial for a successful and long-lasting seal.
Step 4. Test the Repaired Fitting for Leaks
After applying the sealing method, test the repaired compression fitting to ensure the leak is resolved. Reassemble the system and pressurize it to the operating pressure. Carefully inspect the fitting and surrounding area for any signs of leaks. Use a dry cloth to check for moisture or fluid seepage. If a leak persists, re-evaluate the repair and consider alternative sealing methods, such as replacing the entire fitting.
If the fitting holds pressure without leaks, run the system under normal operating conditions for a period of time to ensure the repair’s durability. Monitor the fitting for any signs of leakage or deterioration. Proper testing and monitoring are essential to verify the repair’s effectiveness and prevent future leaks or system failures.
Conclusion
The most common cause of leaking compression fittings is incorrect tightening. To prevent leaks, ensure proper alignment, inspect for damaged components, and follow step-by-step installation guidelines.
My personal experience has shown that attention to detail during installation is key to achieving a leak-free connection. If you have questions about compression fittings or our products, don’t hesitate to contact us.
FAQs About Compression Fitting Leaking
What are Compression Fittings in Plumbing?
Definition: Compression fittings are connectors used to join two pipes or a pipe to a fixture. They create a tight, leak-proof seal by compressing a ferrule (also known as an olive) onto the pipe. These fittings are widely used in plumbing systems due to their reliability and ease of installation.
Components:
Nut: The external part that screws onto the fitting body.
Ferrule/Olive: A ring-shaped component that deforms under pressure to form a seal between the pipe and the fitting body.
Body: The main part of the fitting that houses the nut and ferrule and connects to other plumbing components.
What are Compression Fittings Used For?
Applications: Compression fittings are commonly used in various plumbing applications, including:
Water Supply Systems: Ideal for connecting water lines to fixtures like faucets, sinks, and toilets.
Gas Lines: Used in natural gas distribution systems to ensure safe and reliable connections.
Hydraulic Systems: Employed in industrial settings where high-pressure fluid transport is necessary.
HVAC Systems: Utilized in heating, ventilation, and air conditioning units to connect refrigerant lines.
Advantages:
Reliability: Provide a secure and durable connection.
Ease of Installation: Can be installed without soldering or special tools.
Flexibility: Easy to remove and reassemble for maintenance or repairs.
What Compression Are Copper Fit Socks?
Clarification: It appears there might be some confusion here. “Copper fit socks” likely refers to compression socks rather than plumbing components.
Compression Socks:
Purpose: Designed to provide graduated compression to improve blood flow and reduce swelling.
Pressure Levels: Typically offer mild compression ranging from 15-20 mmHg.
Benefits: Help prevent conditions like varicose veins, edema, and deep vein thrombosis (DVT).
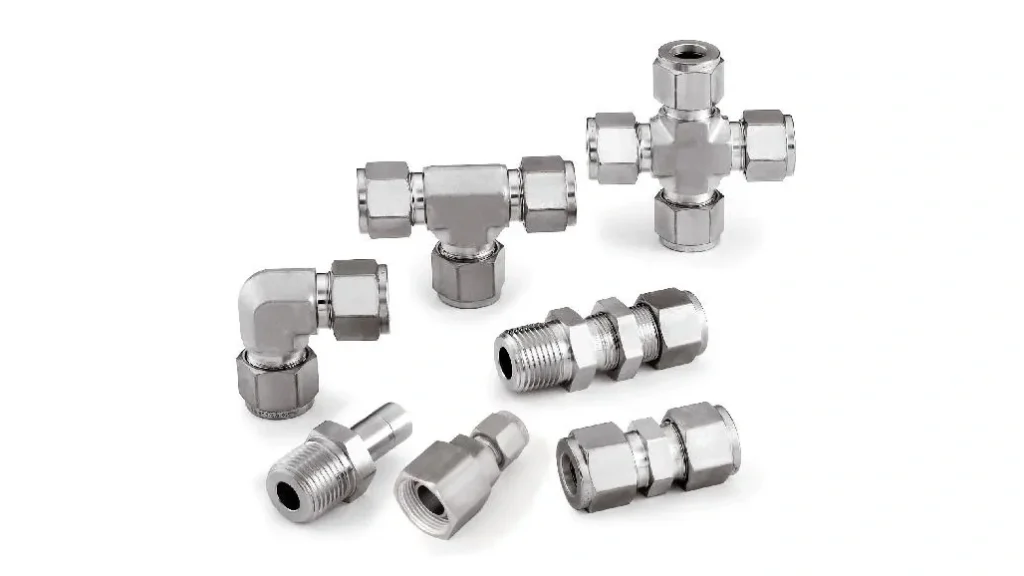
What Does a Compression Fitting Look Like?
Visual Description: A compression fitting typically consists of three main parts:
Nut: A hexagonal or round nut that threads onto the fitting body.
Ferrule (Olive): A ring-shaped component made of brass, stainless steel, or plastic, designed to deform under pressure.
Body: The main part of the fitting that includes internal threading to accept the nut and provides a smooth surface for the ferrule to compress against.
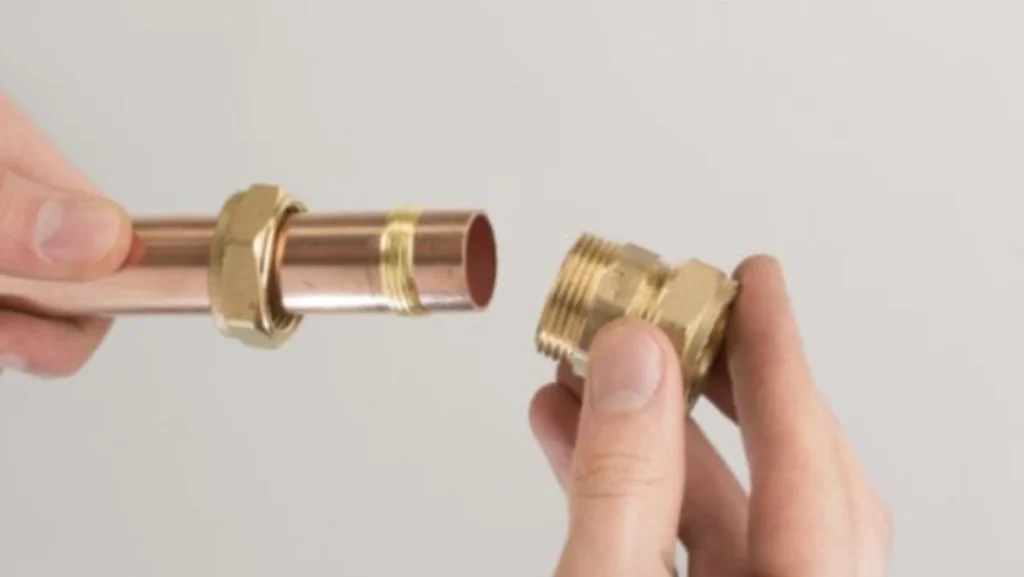
Installation Process:
The pipe is inserted into the fitting body.
The nut is threaded onto the fitting body over the ferrule.
When tightened, the nut compresses the ferrule against the pipe, creating a tight seal.
What is a 3/8 Compression Fitting?
A 3/8-inch compression fitting is specifically designed to join pipes or tubing with a 3/8-inch outer diameter (OD). Common sizes include:
Tube OD: Approximately 9.53 mm (3/8 inch).
Applications: Suitable for smaller plumbing jobs, such as connecting water lines to kitchen faucets or bathroom fixtures.
Barb vs. Compression Fittings: What’s the Difference?
Barb fittings rely on hose clamps to secure a hose, while compression fittings use a ferrule and nut for sealing. Compression fittings are better for rigid pipes, whereas barb fittings are ideal for flexible hoses.
Where to Buy Fittings?
For high-quality compression fittings tailored to your specific needs, consider contacting Dingfeng, a reputable manufacturer specializing in hydraulic components. We offer a comprehensive range of fittings suitable for various industries, including automotive, aerospace, construction, and manufacturing. Our team provides personalized service to help you select the right products and can supply detailed product catalogs upon request.
Additional Resources:
Custom Solutions: We offer custom-made fittings to meet unique requirements.
Technical Support: Our technical experts are available to assist with installation tips, troubleshooting, and maintenance guidance.
Product Catalogs: Request our latest catalogs for a full overview of available products, including dimensions, materials, and application recommendations.


