Proper AN fitting installation is critical for ensuring leak-free and reliable hydraulic system performance. This process demands precision and adherence to specific steps to guarantee a secure connection. Incorrect installation can lead to system failures and costly repairs.
This guide will provide a detailed, step-by-step approach to installing AN fittings, covering everything from preparation to final inspection. By following these instructions, you can ensure your AN fitting connections are robust and dependable.
What Are AN Fittings
AN fittings, short for Army-Navy fittings, are high-performance connections designed for reliable fluid transfer in demanding applications. They adhere to strict military specifications, ensuring consistent quality, interchangeability, and durability. Their robust design makes them suitable for high-pressure and extreme temperature environments.
These fittings are characterized by their 37-degree flared connection, which creates a strong, leak-free seal. They are commonly used in industries such as aerospace, motorsports, and heavy-duty hydraulics, where reliability is paramount. AN fittings are typically made from materials like aluminum or stainless steel, providing excellent corrosion resistance and mechanical strength.
How AN Fittings Work
AN fittings operate on the principle of a 37-degree flared connection, creating a robust, leak-free seal. The fitting consists of a male and female component. The male component features a flared end that matches the 37-degree angle of the female component’s internal seat. When the two components are tightened together, the flared end is compressed against the seat, forming a tight, mechanical seal.
This design is highly effective in high-pressure applications because the flared connection distributes the pressure evenly across the sealing surface. As the pressure increases, the seal becomes tighter, further enhancing its reliability. This is a key reason AN fittings are favored in aerospace and motorsports, where system integrity is critical.
The precision manufacturing and strict military standards associated with AN fittings also play a significant role in their performance. These standards ensure dimensional accuracy and material quality, resulting in consistent and dependable connections. The combination of the flared design and high manufacturing standards makes AN fittings a top choice for demanding fluid transfer systems.
How to Install AN Fittings
Installing AN fittings correctly is crucial for ensuring a leak-free and reliable fluid transfer system. Here’s a detailed guide:
Step 1: Preparing the Components
Before installation, ensure all components are clean and free from debris. Thoroughly inspect the AN fittings, tubing, and any other associated parts for damage or imperfections. Any dirt, metal shavings, or other contaminants can compromise the seal and lead to leaks. Use a clean, lint-free cloth and appropriate solvent to clean all surfaces.
Additionally, make sure the tubing is properly prepared. Cut the tubing to the required length, ensuring a clean, square cut. Deburr the inside and outside edges of the cut to prevent damage to the fitting and ensure a smooth flow of fluid. Proper preparation of the components is essential for a successful and leak-free installation.
Step 2: Assembling AN Fitting
Begin by sliding the sleeve (nut) onto the tubing. Ensure the sleeve is oriented correctly, with the threaded end facing towards the flared end of the tubing. Next, slide the fitting’s socket (or nipple) onto the tubing until it butts up against the sleeve. The tubing end must be fully seated into the fitting.
Carefully flare the tubing end using a 37-degree flaring tool. Ensure the flare is uniform and free from cracks or splits. The flare should seat perfectly against the fitting’s socket. Once flared, slide the sleeve up to the fitting and thread it onto the socket by hand. Tighten the connection using wrenches, ensuring the fitting is properly aligned.
Step 3: Tightening the AN Fitting Connection
Use two wrenches to tighten the connection. One wrench should hold the fitting’s socket stationary, while the other tightens the sleeve. This prevents twisting of the tubing and ensures a proper seal. Tighten the connection to the manufacturer‘s specified torque, if available. If torque specifications are not available, tighten the connection until it feels snug, and then give it an additional 1/6 to 1/4 turn.
Over-tightening can damage the fitting and tubing, leading to leaks or failure. Under-tightening can also result in leaks. It is crucial to find the right balance. After tightening, visually inspect the connection to ensure the flare is properly seated and the sleeve is fully engaged.
Step 4: Inspecting the Installation
After installation, thoroughly inspect the connection for any signs of leaks or damage. Check for any visible gaps or misalignments. Apply pressure to the system and check for leaks using a leak detection solution or by visually inspecting the connections.
If any leaks are detected, carefully tighten the connection further or disassemble and reassemble the fitting, ensuring all components are clean and properly aligned. Recheck the installation after any adjustments to ensure a leak-free seal. Proper inspection and testing are essential for ensuring the reliability of the AN fitting installation.
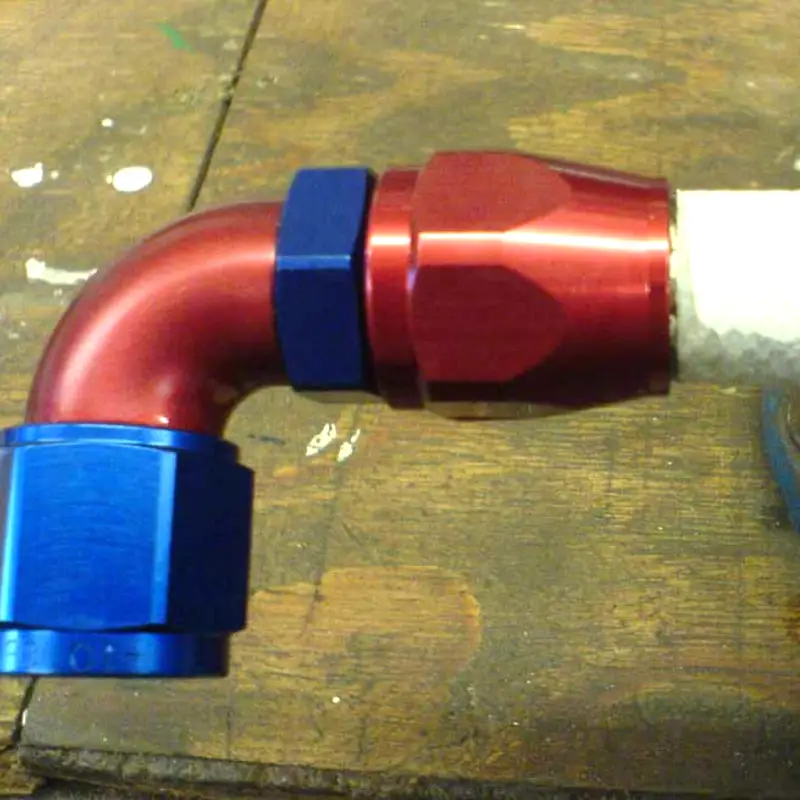
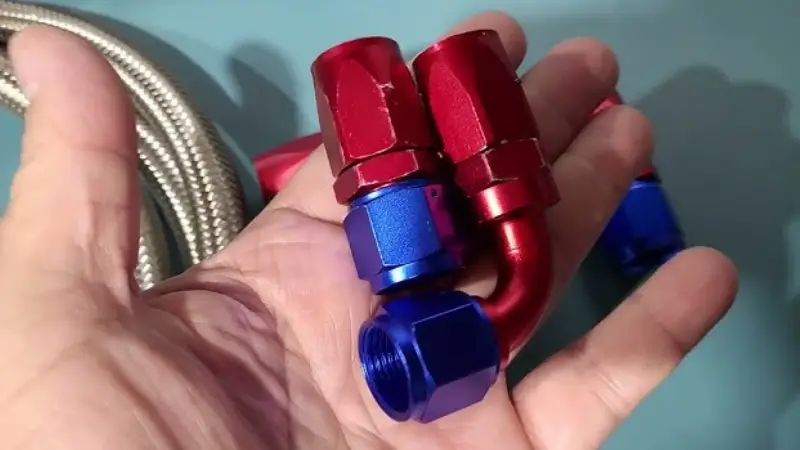
How to Install AN Fitting on Braided Line
Installing AN fittings on braided line requires careful attention to detail to ensure a secure and leak-free connection. Here’s a step-by-step guide:
Step 1: Preparing the Braided Line
Before installing AN fittings, properly preparing the braided line is crucial. First, measure and mark the desired length of the hose. Using specialized hose cutters or a cut-off wheel with a fine tooth blade, make a clean, square cut. Avoid using tools that can fray or damage the braiding, as this will complicate the installation process. After cutting, carefully inspect the cut end for any loose strands or debris. Use a pick or small brush to remove any loose braiding material.
Next, it is very important to use tape around the area that will be cut. This will help prevent the braiding from fraying. After cutting, use a deburring tool to smooth the inside and outside edges of the hose. This step is essential to prevent damage to the fitting’s internal seals and to ensure smooth fluid flow. Clean the interior of the hose to remove any metal shavings or debris generated during the cutting and deburring process. Proper preparation of the braided line is essential for a successful AN fitting installation.
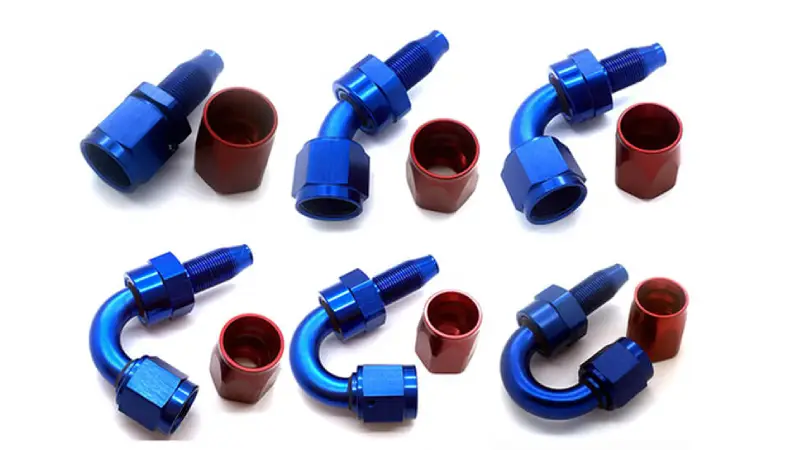
Step 2: Assembling the Fitting Components
Begin by disassembling the AN fitting components. This typically includes the fitting’s socket (nut), the nipple (or insert), and sometimes an olive or ferrule, depending on the fitting design. Ensure all components are clean and free from any contaminants. Inspect each component for damage or defects, such as damaged threads or cracks. If any damage is found, replace the affected component. Then slide the socket onto the braided line, making sure the threaded end faces the cut end of the hose.
Next, if the fitting includes an olive or ferrule, slide it onto the hose. Ensure it is oriented correctly according to the manufacturer‘s instructions. The olive or ferrule is designed to grip the braiding and provide a secure seal. Carefully insert the nipple into the braided hose, pushing it firmly until it is fully seated. Some manufacturers recommend applying a light lubricant to the nipple to ease insertion. Ensure the hose is fully seated against the nipple’s shoulder. Proper assembly of the fitting components is essential for a reliable connection.
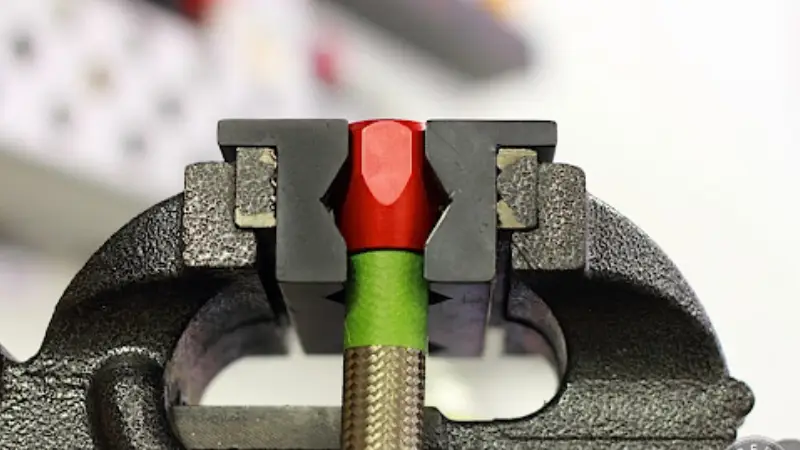
Step 3: Tightening the Fitting
Once the nipple and olive (if applicable) are properly positioned, slide the socket up to the fitting and engage the threads. Begin tightening the socket by hand, ensuring it is properly aligned with the nipple. Once the threads are engaged, use two wrenches to tighten the connection. One wrench should hold the nipple stationary, while the other tightens the socket. This prevents twisting of the braided line and ensures a proper seal.
Tighten the connection to the manufacturer‘s specified torque, if available. If torque specifications are not available, tighten the connection until it feels snug, and then give it an additional 1/6 to 1/4 turn. Avoid over-tightening, as this can damage the fitting and braided line. Over-tightening can also crush the braiding, leading to leaks or failure. After tightening, visually inspect the connection to ensure the socket is fully engaged and the braided line is properly seated.
Step 4: Inspecting and Testing the Connection
After tightening the fitting, thoroughly inspect the connection for any signs of leaks or damage. Check for any visible gaps or misalignments. Apply pressure to the system and check for leaks using a leak detection solution or by visually inspecting the connections. If any leaks are detected, carefully tighten the connection further or disassemble and reassemble the fitting, ensuring all components are clean and properly aligned.
Recheck the installation after any adjustments to ensure a leak-free seal. Conducting a pressure test is highly recommended to verify the integrity of the connection. This test will help identify any potential leaks or weaknesses in the installation. Proper inspection and testing are essential for ensuring the reliability of the AN fitting installation on braided line.
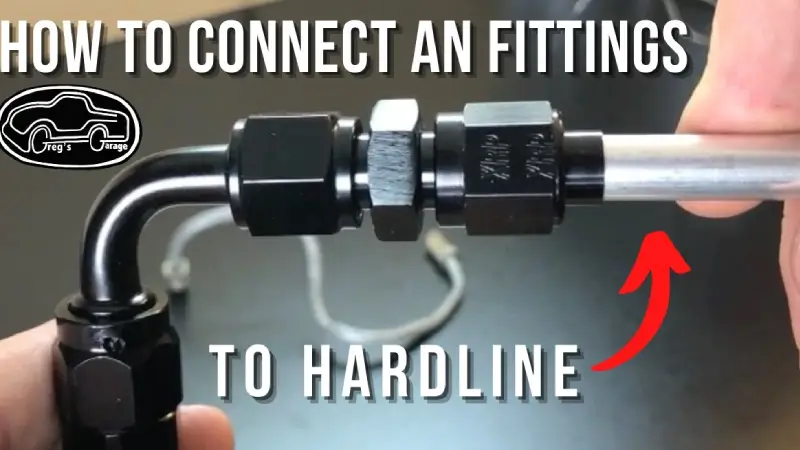
How to Install AN Fittings to Hard Line
Installing AN fittings to hard line requires precision and care to ensure a leak-free and reliable connection. Here’s a step-by-step guide about how to connect AN fittings to hard line in the following:
Step 1: Preparing the Hard Line
Before beginning the installation, ensure the hard line is properly prepared. Start by cutting the hard line to the desired length using a tubing cutter, which provides a clean and square cut. Avoid using a hacksaw, as it can leave rough edges that are difficult to deburr. Thoroughly deburr both the inside and outside edges of the cut using a deburring tool. This step is crucial to prevent damage to the AN fitting and ensure smooth fluid flow.
Clean the hard line thoroughly to remove any metal shavings, dirt, or debris. Use a clean cloth and appropriate solvent to wipe down both the inside and outside of the line. Any contaminants can compromise the seal and lead to leaks. Inspect the hard line for any dents, cracks, or other damage. If any defects are found, replace the hard line to ensure a reliable connection.
Step 2: Flaring the Hard Line
To create the 37-degree flare required for AN fittings, use a high-quality flaring tool specifically designed for hard line. Insert the hard line into the flaring tool, ensuring it is properly aligned and secured. Follow the flaring tool manufacturer‘s instructions to create a precise 37-degree flare. This step is critical for a proper seal, as an incorrect flare angle will result in leaks.
Inspect the flared end carefully for any cracks, splits, or uneven surfaces. The flare should be smooth and uniform. If any imperfections are found, recut the hard line and repeat the flaring process. Ensure the flared end is free from debris before proceeding to the next step. A well-formed flare is essential for a secure and leak-free connection.
Step 3: Assembling the AN Fitting
Begin by sliding the AN fitting sleeve (nut) onto the flared end of the hard line. Ensure the sleeve is oriented correctly, with the threaded end facing towards the flare. Next, slide the AN fitting socket (or nipple) onto the flared end until it butts up against the sleeve. The flared end of the hard line must be fully seated into the fitting socket.
Thread the sleeve onto the fitting socket by hand, ensuring the threads engage smoothly. Tighten the connection using two wrenches. One wrench should hold the fitting socket stationary, while the other tightens the sleeve. This prevents twisting of the hard line and ensures a proper seal. Tighten the connection to the manufacturer‘s specified torque, if available. If torque specifications are not available, tighten the connection until it feels snug, and then give it an additional 1/6 to 1/4 turn.
Step 4: Inspecting the Installation
After tightening the connection, visually inspect the installation for any signs of leaks or damage. Check for any visible gaps or misalignments. Ensure the flare is properly seated and the sleeve is fully engaged. Apply pressure to the system and check for leaks using a leak detection solution or by visually inspecting the connections.
If any leaks are detected, carefully tighten the connection further or disassemble and reassemble the fitting, ensuring all components are clean and properly aligned. Recheck the installation after any adjustments to ensure a leak-free seal. Proper inspection and testing are essential for ensuring the reliability of the AN fitting installation on hard line.
How to Install AN Fittings on PTFE Hose
Installing AN fittings on PTFE hose requires specific techniques and attention to detail due to the unique properties of PTFE. Here is the detailed process for installing AN fittings on PTFE hose systems.
PTFE Hose Characteristics:
- PTFE (polytetrafluoroethylene) hose has a smooth inner liner and is often braided with stainless steel. This construction provides excellent chemical resistance and high-temperature tolerance, but it also requires specialized fittings and installation procedures.
- It is critical to utilize AN fittings that are specifically designed for use with PTFE hose. These fittings typically include an “olive” or ferrule that creates a proper seal with the PTFE liner.
Cleanliness:
Maintaining cleanliness is paramount. Any debris or contamination within the hose or fittings can lead to leaks or system failures.
Installation Steps:
Step 1: Cutting the PTFE Hose:
- Measure and mark the desired hose length.
- Use a sharp cutting tool, such as a cut off wheel, or a fine tooth saw, to ensure a clean, square cut.
- It is highly recommended to use masking tape around the cut location, to help keep the braiding from fraying.
- Thoroughly clean the inside of the hose to remove any debris from the cutting process.
Step 2: Preparing the Fitting:
- Disassemble the AN fitting.
- Inspect all components for damage or defects.
- Ensure the “olive” or ferrule is correctly oriented.
Step 3: Installing the Olive/Ferrule:
- Carefully slide the olive onto the PTFE liner, ensuring it is fully seated.
- It is very important that no braiding is caught between the olive and the PTFE liner.
Step 4: Inserting the Fitting:
- Lubricate the fitting’s nipple with a light oil or lubricant recommended by the manufacturer.
- Carefully insert the fitting into the PTFE liner, using a twisting and pushing motion.
- Ensure the fitting is fully seated.
Step 5: Assembling and Tightening:
- Slide the fitting’s socket (nut) onto the hose and engage the threads.
- Use wrenches to tighten the connection to the manufacturer‘s specified torque.
- Avoid over-tightening, as this can damage the fitting or hose.
Step 6: Inspection and Testing:
- Visually inspect the connection for any leaks or misalignments.
- Conduct a pressure test to ensure the connection is leak-free.
Important Notes:
- Always refer to the fitting manufacturer‘s instructions for specific installation procedures and torque specifications.
- Using the correct tools is essential for a successful installation.
- When working with PTFE hose, take extra care to ensure cleanliness and proper alignment of components.
- It is highly recommended to pressure test any newly assembled hose, before installing it into a vehicle, or system.
Conclusion
Proper AN fitting installation is critical for leak-free, high-performance fluid systems. Careful preparation, correct assembly techniques, and thorough inspection are essential. Incorrect installation can lead to system failures and costly repairs.
For reliable wholesale AN fittings, choose DF Hydraulics. We offer a wide range of high-quality fittings designed for optimal performance and durability. Our expertise ensures you get the right components for your applications.
Visit the DF Hydraulics website to explore our extensive inventory and request a wholesale quote. Our team is ready to assist you with your AN fitting needs.


